(n.) Cabindo: A condo on a lake, among tall old trees. Half cabin, half condo. My first home. This is a running journal of the renovations, projects, and general shoestring budget craziness.


- - - - - - - - - - - - - - - - - - - - - - - - - - - - - - - - - - - - - - - - -

Instagram

Thursday, August 29, 2013

The Shoe Shelf of Happiness

As I've alluded to several times; I have a thing for shoes. I'll chalk it up to being another one of those unavoidable female traits. I love playing outside, getting dirty, firefighting, jumping in rivers, etc.....but damn it I also have a serious soft spot for a sassy, leather stacked-wood platform sandal (among other shoe types).

On sale at Zappos.
These might get ordered later today....we'll see how much willpower I have.

To facilitate my habit, my walk in closet needed some heel-specific storage. It's not a big closet, and in addition to heels, I have a good number of flats. The flats are stored in 2 cubby organizers set long-side-down. They are short enough this way to live under the closet rods and still let the clothes above hang freely, making the most of all available floor space.

Thank you Martha Stewart.
$35 each from Home Depot. $5 each from Craigslist.

All the cubby space is occupied by flats, boots, hiking shoes, blah blah blah; and no other horizontal space is available in the closet for ze heels. So as I've done before....to the wall!

I'd seen Pins about using crown moulding to create heel-specific shelves and decided to give it a try.

Pin
Pin

The ReStore had a whole stack of crown for all of about $0.15/ft. I found a huge piece with a simple profile that was pretty an not at all foofy. After buying ~20 feet I set about building the shelves (without reading any instructions, looked easy enough).

1. Cut up ~20 ft of crown into 6 equal pieces.
2. Drilled 2 pilot holes in each piece.
3. Painted each piece bright turquoise/blue.
4. Measured and marked the wall so they would be evenly spaced from floor to ceiling.
5. Held up each piece and squirted chalk dust through the holes to mark anchor locations.
6. Inserted anchors.
7. Screwed shelves in place.

And finally, to the sound of angels singing: hung up the first set of heels......which immediately fell off.
Oh Blergh!!

I had some rolls of clear plastic drawer liner (random Ikea purchase for the win!) which I cut into strips and attached to the top of each shelf with clear adhesive. The big-boy kind of adhesive from a caulk gun mind you, cuz we don't play around with shoe safety in these parts.

plenty of room for more
awwww yeeeaahhh

The heels now all stay up safe 'n' sound, except when people are coming over in 5 mins and I wildly 'put away' clothes and other random items by launching them into the closet. I am a consummate hostess, clearly.


-Lindsay


*Update: I did get the shoes. Luckily I showed the bf right when they arrived, as he was about to order them for me as a surprise. What a guy!
They are every bit of adorable I hoped they would be, AND comfortable. Those babies will be logging a lot of non-shelf time.

Tuesday, August 27, 2013

Sunny Spot Furniture Swap-out

It's been a very enjoyable, very busy end of summer. But wait: I don't have to go back to school, and it's still hot as heck outside; so I'll keep on keepin on!
I have crammed ALOT into the past couple weeks though, most of it life (not house) related, and am clearly slackin on posts.

Today I'll show you a simple change that has had a big impact on my living room.
Since I'd moved in, my TV was kept in a nice Pier 1 solid hardwood entertainment center.

The living room at thanksgiving, prior to my actual living at the place.
A first attempt at putting furniture against walls. This is not the current layout.

The cabinet ate a good chunk of floor space and kind of closed off the areas in front of each flanking window. It was not being utilized for storage, only TV holding, and I thought I could do better.
After recently mounting the TV (on the left hand wall of the picture above), the cabinet really served no purpose and like so many items before it: the time had come for this little big entertainment center to spread its wings and go.

As usual, Navy helped me get it ready.

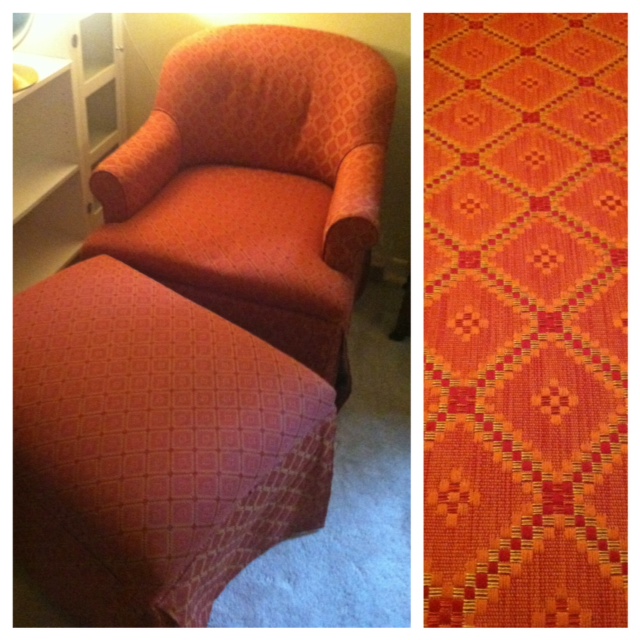
At the same time, I'd arranged to sell a red chair and ottoman because no one ever used them and they took up a lot of room.


I am always pleasantly surprised at the lovely people I meet through Craigslist (just buying/selling, not personals!), and this chair buyer was no exception. Super sweet lady! Very 'favorite aunt' type. Through our conversations, we decided I should shoot her an email whenever I'm looking to unload any furniture: as she loves doing restoration projects too. Uhhh....ok! Thats a great go-to!
I asked her if she happened to need an entertainment center as well, and luckily she did. I bought the thing for $30 from a firefighter friend and got plenty of use out of it, so was happy to give it away and free up some space.

I'd picked up a green velvet easy chair off of Craigslist for free to put between the windows in place of the entertainment center. It compliments the style of the couch and other chair I have in the room, brings in a different texture, and is suuuuuper comfy.
Above it I hung a 'time lapse' drawing I'd done in college of my then-roommates in our living room; moving about and getting re-drawn every 5 minutes. It's a favorite of mine that my brother had on loan for years. I'm so happy to have it back and be reminded every day of my good friends in that goofy college house. Clearly I'm biased, but I also think it looks pretty sweet too.
These two things together make a happy little green spot to sit and enjoy the sun. Navy the model-cat demonstrates:

The windows face south, so it really is that bright in there during the day.
Supposed to be feng-shui good or something like that.
But whatever; I'm just happy to photosynthesise from the couch.

To the left, there is a spot for the most attractive cat scratcher I've come across yet. For anyone that owns a cat: you'll know a subtle, understated cat scratcher that doesn't cost beaucoup bucks is hard to find. This one came from TjMaxx, but if they had 2 I would have bought them both. I hope the fur-monsters don't destroy it too quickly!
To the right is a small table I'd refinished awhile ago which can be a landing place for drinks, and currently houses the painted fan and obligatory nick nacks. Cuz no horizontal surface in my very-lived-in house goes without some 'artfully' arranged clutter.

Green down pillow from TjMaxx
Chevron scrap-fabric pillow.
Navy & her favorite baby.

When I say 'model cat', I really mean it. She was half way across the house and was more than happy to get scooped up, placed on the chair, and sit still. So much so that she started purring and meowing at me. I should hire her out to an animal talent agency to finance my Home Depot addiction. She'd be such a cute enabler......

Chevron fabric was leftover from dining room chair upholstering.
More on that later!

One more shot, just because I finally remembered to take pictures while it was light out.


-Lindsay

Tuesday, August 20, 2013

Summer Porch Food Round-up

I went a little overboard on plants this summer. Home Depot's plentiful garden department, and the excitement of having my own porch overcame me. The result is about 20 pots with anywhere from 1 to 6 plants per pot. I've kept almost everything alive, but its all a little much.

just 8 of the ~13 plant containers on the back porch

As I talked about in an earlier post, I had a goal to plant something I could eat. The herbs have done gangbusters. Even though the pepper, squash, and cucumber plants haven't produced any veggies, they've put out a lot of pretty flowers and thus have earned their keep.


The tomatoes have been quite a different story. I planted early, used several varieties, fertilized, de-bugged, watered, watched and waited. No tomatoes. I plant sat a friend's tomato which quickly grew several good sized fruits. I even put my plants near the damn friend-mato thinking perhaps there was an optimal sun situation there. Mine just flowered, got huge, and laughed. grumble grumble grumble...


4ft tall tomato plants

Finally one of the 6 towering plants mustered an actual tomato.

Why hellooo dere.

It was a teeny tiny little thing, and this morning was it's time of reckoning.

side note: Beans LOVES his perch.

It was delicious! 

That little tomato definitely inspired me to eat more tomatoes next summer.....from the farm stand. 
I'll stick with petunias, they love me back.


-Lindsay

Monday, August 19, 2013

Indecisive Antique Door Lover - Seeking Creative Direction

Loves wood grain, disintegrating paint, and long walks through yard sales. Tired of the barn scene and looking for a sturdy companion. Turn offs: dry rot, reproductions, high prices.

It's no wonder I found my Bf in the real world and not through personals. But anyway.....

I got 99 problems; and an over abundance of affection for old weathered doors is one. Say that ten times fast. Or not. Whatevs.

I am prone to stalk Craigslist for old doors and run out during lunch when someone 'curb alerts' a beautifully distressed old door. Picture a wacky wavy inflatable arm flailing tube man. That is me.

Recently I'd grabbed an old door from the ReStore, with a sliding door project in mind.

Picture taken at ReStore and sent to my Momma for consultation.


Soon there after I picked up one of the aforementioned curb alert doors during a lunch break (there was a lot of arm waving).


There were several available,
but I had just enough self control and trunk space to grab only the prettiest one.


Both of the doors had lots of dirt, cobwebbs, and peeling paint.
I loved them.


This pic made the photog Bf proud:
oooh diagonals
oooh texture
oooh moooody


They each got a good scrubbing and thorough sanding.


The front porch is sanding central.
In an attempt to mitigate their certain dislike of me all my noise,
I always make sure to go downstairs and sweep up the layer of
sawdust from my long-suffering neighbor's porch floor.


As the sanding progressed, the texture and age of the doors only got more drool worthy. All the flakes and rough spots were gone, but the chipping pattern remained and the beauty of the wood grain came through.


One of the doors has more pronounced chipping.


The other one has beautiful dark wood grain worn at the high points and on each corner.
The pictures don't convey how pretty and charming it is.


I used 80 then 120 sanding pads on the sander, along with a sanding block around the edges.
When the doors stopped molting paint chips and everything was smooth, I applied several thin layers of poly-acrylic.


We work all night here at The Cabindo.


But now, other than taking pictures, I'm at a loss of what to do with them.


Artsy McFartsy


Sliding barn door at the end of the hallway to contain cats? (Original plan when I had just one)
pin

Wall hanging? (clearly not this many!)
pin


Headboard? (Though I like my existing bed frame. But I do have a spare chandelier like that.....)
pin


Bench? (I can't bring myself to cut them up. We'll see how I feel the longer they sit around.)
pin

Who knows. They are just too pretty to not share, even with an unknown destiny.
:)


-Lindsay

Tuesday, August 13, 2013

Wainscotting Makes Me Feel Fancy

The image in this pin really got my motor going:

pinterest. duh.
And this this one sealed the deal:

A plate shelf on top? SOLD.


I would be wainscotting/board n batten'ing/panelling. Whatever you want to call it.
It had to happen.
My ugly bathroom depended on it.
I had already put in a new floor, so was ready to tackle the walls.

My dad was excited to help me execute the wainscotting/board n batten/panel walls after I'd showed him a million pictures and gushed like a rabid school girl with a Beiber crush. He might have been simply excited for me to shut up. If that was the case: worked like a charm!
He already had a bunch of lumber lying around that we could use. It was new and matching, but thicker than the MDF most tutorials floating around the blogosphere are recommending. This installation had to content with moisture, so it was just as well to go a non-MDF direction. And 'free' always sways my decision to: "ummm.. yeah we're gonna go with that."

I figured out how the spacing of each vertical board would work in the room by guesstimating how much space one hanging towel would take to look nicely framed (ala the top picture), then measured out as many of those panels as would fit on the large wall.  Turns out the answer was 4 panels, so there would be 5 'batten' pieces for the large wall across from the toilet and vanity with about 14.75 inches between each. The other two walls would follow the same batten spacing.
The elements of the wall are as follows:

shelf board needs to straighten up and fly right

The height of the top shelf is just above my shoulder height while wearing heels, so I wont ever smack into it. Cuz I'm a thinker. And a consummate klutz.

Action time:
We cut all the wood Dad had available, ran to Home Depot for a little more, cut that too, and ended up after dark with a big pile in the driveway. All the boards were given a good edge sanding to smooth out any sharp corners and prevent clothing or towel snags.

I do my wooood cutting at night, so I can, so I can.....
watch the sawdust swirl past my eyes

It made me a bit nervous that this mass of wood was going to be put into my smallish bathroom. As it made its way onto the wall though, the pile (& anxiety level) quickly shrunk as the wainscotting began to take shape.

framed out large wall

All of the boards were held up in place first and given several small pilot holes. A big thanks to my Dad and the Bf for holding up the big horizontal header boards as I leveled and drilled! Each corresponding hole in the wall got an anchor, and the holes in the wood got countersinks.
I put up a frame of the header, footer, and outside vertical boards first, then repeated the process with the remaining vertical battens. These got attached to the wall in about a million points so that even with moisture in the picture, they would not warp.
The top moulding was screwed into the header board, and the 3.25" plate shelf (same width as the vertical boards) screwed into the wide supportive surface created by the tops of the moulding and header board.

Wood filler x a $#!+ ton of holes = a crazy long time

As you see above, all those holes got patched with wood filler. Every place where wood met the wall also got wood filler (ex. sides of the battens), as well as every place a piece of wood met another piece of wood (ex. batten to header board).
Sanding all of the wood filler spots, refilling, waiting, and re-sanding was by far the most tedious part of this project and dragged on for about a month because I was not a fan and kept avoiding it.
I learned afterwards that you can do the edges and joins with caulk.... :|
If I ever do wainscotting again: I will definately be doing that to minimize the sanding portion of the project.
Once I put my big girl pants on and finally finished the sanding, it was time to paint. Everything got a coat of white primer, followed by a slightly off-white semi-gloss to match the color of the tiles. This helped to unify the room and avoided making the tiles look dingy.

For the towel hooks: Ikea's BLECKA hooks had the modern look and inexpensive price I was going for. But what a terrible name!! Poor towel hooks, they are going to get a complex.

$5 for 2 - 2.75" hooks
$5 for 4 - 1..5" hooks

I used 4 of the large ones on the long wall for bath towels, 2 of the smaller ones on the toilet/vanity wall for hand towels, and 2 more of the smaller ones on the back of the door to replace the existing rusted hook.

Fancy, fancy!!

This project gave me a huge boost of confidence that I could see something I liked, and translate it to my space in a high quality and inexpensive way.

Price breakdown:
Wood - Free! (probably would have been about $80)
Hooks - $15
Paint - $20
   Hardware - $15  
Total - $50
(if not for Daddy-o's lumber: $130)


-Lindsay

Friday, August 9, 2013

Storage, in a Time of Limited Space (master bathroom edition)

Let me paint you a picture of my 'master' bathroom.

yeah this is a picture, 'painterly' words below

It's on the hall rather than connected to a bedroom, which I consider awesome because:
   1. I live here alone, so theres no need for the additional privacy of an en suite.
   2. In a 1.5 bathroom/2 bedroom unit, the off-the-hallway factor makes it guest/host friendly: cuz I am just fine with people NOT walking through my bedroom to get to the shower when staying over.
   3. For the future: it's very rental friendly. Two housemates would not go for a unit with a single shower that is an en suite. Having it in the hallway gives equal access. While I'm not going to be renting the place out for a couple years, I definitely kept that potential in mind when looking at places, and the hallway bath was one of the reasons that made this particular property stand out from the field. I have a good friend with a 1 bath (en suite) condo who loves to entertain, and it works for her because she is super neat and tidy; but I know my shortcomings, among them that my bedroom is almost never presentable enough to be a public thoroughfare.
So, long story long: I knew what in a bathroom would work for me, and luckily found it.

though it looked like this at first

While I do like my bathroom, it is standard 5'x10', which does the job nicely, but is not what anyone would call spacious. The vanity is small and mainly used for cleaning materials/toilet paper/curling irons/other big stuff. I have lots of soaps n lotions n hair products that needed a home though too. I'm a girl, goes with the territory, right?
I wanted to store all my bottled items within arms reach, in an organized and non-hoarder-ish way. The vanity counter top is small and looks cluttered with more than a few items. There is no room for a storage tower all occupiable floor space already has inhabitants (small grey trash can between tub n toilet, basket with rolled towels between toilet and vanity).

I'm excessively fond of this basket.
$10 at T.J. Maxx

As the saying goes: to the windooooow, to the wall..... or something like that. I have no window in there, so wall it was. I wanted to keep the space as open as possible, so though glass shelves would do nicely. As usual: enter Ikea, with the GRUNDTAL glass shelf.
$20 for 31"

I hung them on the same wall as the vanity, because the toilet sticks out underneath, so I wouldn't be running in to them there. Cuz if they were on the opposite wall, I'd have lost an eye in no time, and 'Pirate' is not a good look.
I really like how the paint color on the wall goes with the color of the glass.


Once the shelves were up, I needed bins of some sort to group small items, because I knew things were never going to be as sparsely populated as the picture above. I cut up an old t-shirt and crocheted it into a little basket with side handles.

lots of items, all in their place

It's adorable and I'm a big fan, but cutting up the t-shirt and crocheting gave me a blister big enough to stop after one basket.
I had 4 small grey felt bins lying around that I'd picked up on clearance from Michaels at some point in the unrememberable past.


I knew all that craft item hording would pay off at some point!! Most small items live in those bins.


Frequently used things live in the corner of the vanity and can be easily moved up to a shelf when people come over.
Face wash, sunscreen, chap stick, etc, live in the crocheted basket.
Jewelry gets deposited at the end of the day in a teacup I made in college and a saucer my mom gave me.
Toothbrush and toothpaste lives in a blown glass cup from an art studio in St.Louis I visited with my grandmother.
I really enjoy to interacting with special things on a daily basis to fulfill a need, rather than say going out and buying a matching bathroom set from Target. Not that I have anything against Target, it's just nice to use meaningful items rather than have them sit in a box or on a dusty shelf.


Ahhhhhh......organization I can keep up with, for $55.


-Lindsay