(n.) Cabindo: A condo on a lake, among tall old trees. Half cabin, half condo. My first home. This is a running journal of the renovations, projects, and general shoestring budget craziness.


- - - - - - - - - - - - - - - - - - - - - - - - - - - - - - - - - - - - - - - - -

Instagram

Showing posts with label chair. Show all posts

Friday, July 11, 2014

Say whaaat? - Stool edition

On my way to a friend's house for dinner a few months ago, I stopped by a bakery to grab some treats for dessert. The pastries were delicious but the real score of the evening was a wooden stool from the dumpster behind the neighboring optometrist's office.
And that's saying something, because I really love dessert.


Scandinavian simplicity? Check
Solid build? Check
A good place to set my drink/feet/cat/remotes? Check
Not ikea? Check
Freeeee? Check

The legs were pretty dinged and dirty, and though scrubbing cleaned them up; they still needed help.
I gave them a quick sand and a few coats of bright blue paint to bring them back to life.

I got a fever.
And the cure is more cowbell paint.

They got reattached to the also-scrubbed seat.


Et voila; portable side table extraordinaire.


I'm in the camp that considers painting good wood semi-sinful. But these legs were not in great shape, and in the end I really like the combination of wood grain and paint much more than straight wood on this little guy.

It fits well in the corner between my couch and trunk, and gets A LOT of use. ie. dinner table for 1.

No Mr.Stool, stay away from the light!!

Only today when writing this did I look up the makers mark.


I found out this is an Alvar Aalto 'stool 60'; designed in 1933, and considered an iconic modern design piece.
They have been in production since then, and new; a single stool is worth upwards of $300.
Um.......... wow!!! That is one good dumpster diving investment.

My feet/beer/cat/dinner are feeling FANCY right now.


-Lindsay P


Tuesday, September 24, 2013

Recent Projects - from the Land Where Nothing Ever Gets Finished

As is pretty clear: new posts have been MIA lately.
I blame a lack of time, a bad habit of not finishing projects, and my constant failing to take some damn pictures of the things I do get done!
Below are a few of the projects I've been working on recently, in no particular order.
As I get my $h!+ together and finish them up, I'll post a rundown on each.


  • Mounted my TV on the wall.
  • - Getting rid of the massive entertainment center and putting the tv up on the wall has totally changed the living room.

Makes my living room hotel-sexy.


  • Worked on screening in the back porches.
  • - Started on this in the spring, and when it got hot outside I got lazy. 
    - Came back to it his week and discovered a roadblock I'll have to overcome with a bit of rework. But, progress is being made.

Patio progress. Catio creation.


  • Reupholstered 3 old office chairs for use in the dining room.
  • - Related pattern (chevrons) and color (pinks!).

$5 each, and now all sassy.

- And made a bunch of coordinating pillows.

Modeled by the glamour-puss.
Meee-ooow


  • Customized and hung a new dining room light.
  • - Changed my original plan from this post, but the result is close.

Real pictures to follow.


This was an exercise in patience and high # sandpaper.
I cant' wait to be finished and show you more. It's crazy gorgeous.


  • Picked up a couch and two chairs from Craigslist and skinned them for their leather.
  • - Then washed and conditioned the heck out of it.
    - Then made a purse out of said leather.

Lots of oiling. And shooing away cats who wanted to lick up ze oil.


  • Received a used OTR microwave from the BF's parents to replace my broken one.
  • - Pictured below is die kaputt maschine. Mounting is in progress for the new-to-me zapper.

Best looking appliance when I moved in: only one that totally didn't work.
'Best' being SUPER relative.


  • Mounted my grandfather's antique tools.
  • - For display and ease of use.
    - Progress has gone at the same (snail's) pace as setting up the office/second bedroom.

Aaah. Love, love, love this project.
More to come!


  • Relined an antique humpback trunk from my grandmother.
  • - Removed the old lining and blitz cleaned 40 years of dried mold. During which; the house smelled kind of good, in a granny's-basement sort of way.

Creative fabric manipulation 101.


  • Played florist and created all the flowers for a friend's event.
  • - Tons of happy flowers to honor the passing of her beloved aunt.

10 arrangements, 2 Xl altar pieces, and a 24' broken heart.


  • Found and shined up some old silver pieces.
  • - Sunday afternoon thrift store browsing.
    $20 in my pocket got me both of these AND a bangin smoothie. #winning

A good deal + a little elbow grease = not-so-shabby chic accent pieces.


  • Turned a retired firefighter coat into a throw pillow cover.
  • Will be a wedding present for a fellow firefighter, made from his old coat.

The most ridiculously complicated 'easy' project ever.


  • Made a fuse box cover.
  • - Out of leftover paint chips from picking my wall colors.

For an ugly eye-level fuse box.


  • And spent some quality time with my favorite furry guy.
  • - Like all good animals, anytime his person is on the floor for more than 10 seconds(dining room chair upholstering, in this case); it means PLAYTIME NOW.

He managed to get himself stuck in a bag handle and dealt with it by flopping over and looking cute.
Good call, actually.


One of these days I will find the missing hardware, cut the last piece, install the whatever, take a picture, or write a post about each of these projects. In the meantime, they are already improving The Cabindo, half-finished states and all. 

At the end of a recent post, John from Young House Love touched on being content with a home in-progress. I'm accepting that more and more, and it helps that most of my big projects are to the point that I don't have multiple construction zones 24/7. Home feels like home when I get there, rather than a to-do list. Theres still plenty to tackle, but I'll get there eventually.
My wallet surely appreciates the lul. Though it feels too long since I've last seen my buddy Mary at the Home Depot paint counter.....


-Lindsay

Tuesday, September 3, 2013

Quick Refinishing of Old Chairs

One can never have enough seating. Who knows when 20 people might be over and all need to sit at the same time? Perhaps someone will have a toast or a speech? (My brother is particularly good at this mid-party)
Some people may be on the porch or squooshed together 4-on-a-3-seater-couch: but they will all be sat.
It's good to be the king have chairs.
I am of the mindset that they don't need to match, just to each be interesting and work with the other chairs in the room. To this point; I have revived many a lonely chair and added it to my living/dining/office/bed room.


My basic steps for quick and easy (1 hour or less) refinishing are as follows:

1. Scrub the bejeezus out of it.
- It may be in better shape under 30 years of dirt/tar than you thought, and can possibly stop here.
Also, nobody likes surprise spiders.

2. Tighten screws or otherwise shore up any wiggles/structural integrity issues.
- We drink enough wine in my house and don't need any help being unsteady.

3. Remove anything that rhymes with 'schmynul'.
- I've tried vinyl paint with NO success. Just get rid of it. 

4. Use Restore a Finish to renew all wood surfaces.
- Do this outside only and scrub hard. Start with steel wool and finish with a gentile paper towel wipe over the surface in the direction of the grain.
- I like leaving wood unpainted and beautiful. It doesn't age the piece if it is in good condition and any reupholstery is modern enough to elevate it out of grandma's basement.

$9 at Home Depot

 5. Fix or hide any cosmetically damaged parts.
- A favorite way to do this is to paint any damaged areas black (bilaterally), if it makes sense to do so. This masks the damaged area while sometimes highlighting a section of architectural interest. (see pic below for good example) 

6. Recover the seat with a modern fabric to bring the whole thing up to date.
- Just flip and staple on the new fabric.
- Scotch guard BEFORE reattaching cushion. Otherwise, you'll leave a snotty looking film on the wood that's less than a joy to remove.

All things done here: refinished wood, painted damaged caning, bright modern fabric.

I've seen this type of chair everywhere recently for hundreds of dollars a piece,
but this was a freebee from a former roommate who lacked vision/chair hording tendencies.
Advantage=hoarder Lindsay


As you can see in the background above, there is a black chair with a seat covered in floral mustardy fabric, which picks up on the tones and pattern of the chair in the foreground.
The background chair got painted all black because it was not beautiful old hardwood, but the black paint ties in with the painted caning on the front chair, and makes the two pieces live easily together in the same space.

Using similar style and technique on various pieces gives them an air of consistency, as was seen in an earlier post about restoring an antique arts and crafts chair.


So even though I love me some patterns; I stick to common colors and themes and thus the pieces relate to each other.
I also strive to give each patterned statement chair enough breathing room, and keep all other large fabric swaths in the area solid and calm (couches, ottomans, etc in dark blues or greys), so no one has any visual seizures and each fancy piece can stand out instead of compete.


-Lindsay

Tuesday, August 27, 2013

Sunny Spot Furniture Swap-out

It's been a very enjoyable, very busy end of summer. But wait: I don't have to go back to school, and it's still hot as heck outside; so I'll keep on keepin on!
I have crammed ALOT into the past couple weeks though, most of it life (not house) related, and am clearly slackin on posts.

Today I'll show you a simple change that has had a big impact on my living room.
Since I'd moved in, my TV was kept in a nice Pier 1 solid hardwood entertainment center.

The living room at thanksgiving, prior to my actual living at the place.
A first attempt at putting furniture against walls. This is not the current layout.

The cabinet ate a good chunk of floor space and kind of closed off the areas in front of each flanking window. It was not being utilized for storage, only TV holding, and I thought I could do better.
After recently mounting the TV (on the left hand wall of the picture above), the cabinet really served no purpose and like so many items before it: the time had come for this little big entertainment center to spread its wings and go.

As usual, Navy helped me get it ready.

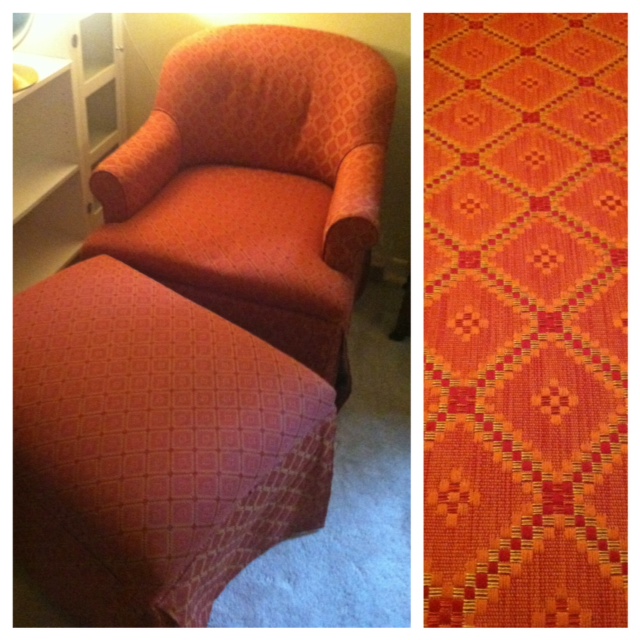
At the same time, I'd arranged to sell a red chair and ottoman because no one ever used them and they took up a lot of room.


I am always pleasantly surprised at the lovely people I meet through Craigslist (just buying/selling, not personals!), and this chair buyer was no exception. Super sweet lady! Very 'favorite aunt' type. Through our conversations, we decided I should shoot her an email whenever I'm looking to unload any furniture: as she loves doing restoration projects too. Uhhh....ok! Thats a great go-to!
I asked her if she happened to need an entertainment center as well, and luckily she did. I bought the thing for $30 from a firefighter friend and got plenty of use out of it, so was happy to give it away and free up some space.

I'd picked up a green velvet easy chair off of Craigslist for free to put between the windows in place of the entertainment center. It compliments the style of the couch and other chair I have in the room, brings in a different texture, and is suuuuuper comfy.
Above it I hung a 'time lapse' drawing I'd done in college of my then-roommates in our living room; moving about and getting re-drawn every 5 minutes. It's a favorite of mine that my brother had on loan for years. I'm so happy to have it back and be reminded every day of my good friends in that goofy college house. Clearly I'm biased, but I also think it looks pretty sweet too.
These two things together make a happy little green spot to sit and enjoy the sun. Navy the model-cat demonstrates:

The windows face south, so it really is that bright in there during the day.
Supposed to be feng-shui good or something like that.
But whatever; I'm just happy to photosynthesise from the couch.

To the left, there is a spot for the most attractive cat scratcher I've come across yet. For anyone that owns a cat: you'll know a subtle, understated cat scratcher that doesn't cost beaucoup bucks is hard to find. This one came from TjMaxx, but if they had 2 I would have bought them both. I hope the fur-monsters don't destroy it too quickly!
To the right is a small table I'd refinished awhile ago which can be a landing place for drinks, and currently houses the painted fan and obligatory nick nacks. Cuz no horizontal surface in my very-lived-in house goes without some 'artfully' arranged clutter.

Green down pillow from TjMaxx
Chevron scrap-fabric pillow.
Navy & her favorite baby.

When I say 'model cat', I really mean it. She was half way across the house and was more than happy to get scooped up, placed on the chair, and sit still. So much so that she started purring and meowing at me. I should hire her out to an animal talent agency to finance my Home Depot addiction. She'd be such a cute enabler......

Chevron fabric was leftover from dining room chair upholstering.
More on that later!

One more shot, just because I finally remembered to take pictures while it was light out.


-Lindsay

Monday, July 1, 2013

Rebuilding and Updating an Arts & Crafts Chair

'Antsy' is a vast understatement of how I felt while under contract, but waiting to close on my place. It had such possibility, and so many projects I couldn't wait to sink my teeth into. But, as it also belonged to someone else, and I only break into structures for fun on the weekends when there's a fire (rare) or mischievous kid (more frequent) behind the door; I had to simmer down and work on something non-structure related.

I really like the work a lot of people are doing now to update old chairs with new fun upholstery. Chairloom is a particular favorite. Be prepared to drool at some of their before & after's.

so chic and understated

oooooh sweet nelly

I would LOVE to find something worthy of saving up the $$$$ to have them upholster one day, a beautiful Edwardian sofa or an intricate arm chair. Clearly worth it if you can afford it, but for now, I tried my hand at updating a piece I'd gotten for free off of Craigslist.


plaid makes him grumpy

I loved the simplicity of the piece; totally devoid of decoration save for the beauty of the hardwood. I thought that it would take easily to being modernized while still retaining a good dose of vintage charm. The wood was super dry with some broken areas, and the seat was lumpy and structurally unsound; so it was total reconstruction time.

Dis-assembly of the chair uncovered errant Cheerios, plastic straws, pet hair, and general schmutz.

delish

I tried to take a picture of each step to remind myself how the chair was put together, in case I forgot by re-assembly time. Luckily for me, this thing was Ikea v1.0: everything had dowels with corresponding slots and wing nuts, so it came apart with the removal of 4 bolts and a couple of seal-bark accompanied tugs.


smellya later trim

evidence of repeated reupholstering

Long story short: I ripped out everything: fabric, millions of tiny copper nails and staples, all the horse/hog hair padding, old strapping, etc. Minus the nails, which are being saved for something in the future; this was fun and quick! 
I scrubbed, repaired, sanded, conditioned, stained, and poly'd the wood. This part was a bit tedious, as it took a while to get into each nook and crannie several times over with multiple coats of stain, poly, and waiting. It was totally worth though, as the wood is now beautiful and healthy enough to last a few more decades.


mahog-a-liscious

I wanted to un-grandpa the fabric (as much as I love grandpas), and do a non-girly floral pattern. Joann's often has good coupons you can find online, and frequent sales; so I went on a sale day (50% off) with an additional coupon in hand (40% off) to get strapping, foam blocks, sheet batting, fabric, and trim. Foam is EXPENSIVE, but with the sale and the coupon I managed to spend only about $30 for it, which otherwise would have been close to $100. 
Ain't nobody got time for that. 


I used the old fabric as a guide to cut the new fabric, leaving an additional two inches all around to account for non-stretchy fabric, my own inevitable mistakes, and trimming later. I re-strapped, padded, and upholstered the seat and back panel in the same way they were before.

pardon the washed out colors

This was a great first 'big' reupholstering project because I didn't need to sew or have any special upholsterer knowledge, just enthusiasm and the ability to use a staple gun. Said enthusiasm broke the first two staple guns, but the third one is still alive....for now.

I'm exceedingly pleased with the results and the chair has become a favorite place to sit, especially for my daddy-o, who likes the cup-friendly wide arm rests.

Before & After
even the cat changed pattern


-Lindsay