(n.) Cabindo: A condo on a lake, among tall old trees. Half cabin, half condo. My first home. This is a running journal of the renovations, projects, and general shoestring budget craziness.


- - - - - - - - - - - - - - - - - - - - - - - - - - - - - - - - - - - - - - - - -

Instagram

Showing posts with label light. Show all posts

Tuesday, September 24, 2013

Recent Projects - from the Land Where Nothing Ever Gets Finished

As is pretty clear: new posts have been MIA lately.
I blame a lack of time, a bad habit of not finishing projects, and my constant failing to take some damn pictures of the things I do get done!
Below are a few of the projects I've been working on recently, in no particular order.
As I get my $h!+ together and finish them up, I'll post a rundown on each.


  • Mounted my TV on the wall.
  • - Getting rid of the massive entertainment center and putting the tv up on the wall has totally changed the living room.

Makes my living room hotel-sexy.


  • Worked on screening in the back porches.
  • - Started on this in the spring, and when it got hot outside I got lazy. 
    - Came back to it his week and discovered a roadblock I'll have to overcome with a bit of rework. But, progress is being made.

Patio progress. Catio creation.


  • Reupholstered 3 old office chairs for use in the dining room.
  • - Related pattern (chevrons) and color (pinks!).

$5 each, and now all sassy.

- And made a bunch of coordinating pillows.

Modeled by the glamour-puss.
Meee-ooow


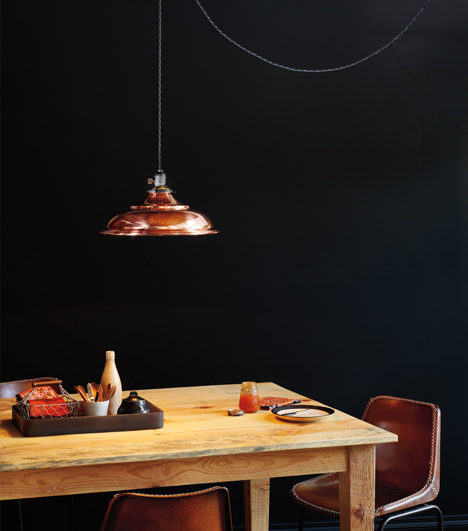
  • Customized and hung a new dining room light.
  • - Changed my original plan from this post, but the result is close.

Real pictures to follow.


This was an exercise in patience and high # sandpaper.
I cant' wait to be finished and show you more. It's crazy gorgeous.


  • Picked up a couch and two chairs from Craigslist and skinned them for their leather.
  • - Then washed and conditioned the heck out of it.
    - Then made a purse out of said leather.

Lots of oiling. And shooing away cats who wanted to lick up ze oil.


  • Received a used OTR microwave from the BF's parents to replace my broken one.
  • - Pictured below is die kaputt maschine. Mounting is in progress for the new-to-me zapper.

Best looking appliance when I moved in: only one that totally didn't work.
'Best' being SUPER relative.


  • Mounted my grandfather's antique tools.
  • - For display and ease of use.
    - Progress has gone at the same (snail's) pace as setting up the office/second bedroom.

Aaah. Love, love, love this project.
More to come!


  • Relined an antique humpback trunk from my grandmother.
  • - Removed the old lining and blitz cleaned 40 years of dried mold. During which; the house smelled kind of good, in a granny's-basement sort of way.

Creative fabric manipulation 101.


  • Played florist and created all the flowers for a friend's event.
  • - Tons of happy flowers to honor the passing of her beloved aunt.

10 arrangements, 2 Xl altar pieces, and a 24' broken heart.


  • Found and shined up some old silver pieces.
  • - Sunday afternoon thrift store browsing.
    $20 in my pocket got me both of these AND a bangin smoothie. #winning

A good deal + a little elbow grease = not-so-shabby chic accent pieces.


  • Turned a retired firefighter coat into a throw pillow cover.
  • Will be a wedding present for a fellow firefighter, made from his old coat.

The most ridiculously complicated 'easy' project ever.


  • Made a fuse box cover.
  • - Out of leftover paint chips from picking my wall colors.

For an ugly eye-level fuse box.


  • And spent some quality time with my favorite furry guy.
  • - Like all good animals, anytime his person is on the floor for more than 10 seconds(dining room chair upholstering, in this case); it means PLAYTIME NOW.

He managed to get himself stuck in a bag handle and dealt with it by flopping over and looking cute.
Good call, actually.


One of these days I will find the missing hardware, cut the last piece, install the whatever, take a picture, or write a post about each of these projects. In the meantime, they are already improving The Cabindo, half-finished states and all. 

At the end of a recent post, John from Young House Love touched on being content with a home in-progress. I'm accepting that more and more, and it helps that most of my big projects are to the point that I don't have multiple construction zones 24/7. Home feels like home when I get there, rather than a to-do list. Theres still plenty to tackle, but I'll get there eventually.
My wallet surely appreciates the lul. Though it feels too long since I've last seen my buddy Mary at the Home Depot paint counter.....


-Lindsay

Tuesday, June 25, 2013

Mercury Glass Solar Mason Jar

My porch currently has no electric wiring or light fixtures, so has been in need of non-flame soft lighting.  Solar jars caught my eye, but I wasn't really loving the frosted or firefly versions. I settled on mercury glass, as they seem to have that perpetually good (to me) mix of vintage and modern. Commercially available ones were chintzy looking and small, so I set out to make my own.

I'd scanned a couple tutorials on mercury-glassing and solar jar making. The basic ingredients are as follows:

1. Mason Jar
2. Solar light source
3. Spritzer bottle
4. Metailic spray paint
5. Water (some people use 1/2 water, 1/2 vinegar. I had no vinegar and used a slightly different method)


from Landee see, Landee do

While the ones above are more silver than clear glass (and beautiful as they are), I wanted mine to be more translucent so plenty of light can shine through.

I picked up two old Atlas glass lidded mason jars from Chantilly Habitat for Humanity ReStore for $1 each.


Two solar path lights from Target on sale for $2 each. (similar to below, not exactly)


A spray bottle from Home Depot for $1.


A can of metallic silver paint from Wal-Mart for $4.


And tap water for freeeeee!


My steps were as follows for the glass treatment and light assembly.

Glass:
1. Lightly spritz the inside with water.
2. Spray the paint inside.
3. Swirl the jar around to mottle the paint and water.
4. Spritz/swirl again if more movement/thinner paint is desired.
5. Set upside down on paper towel for excess water/paint oil slick to drain.
6. Wait to dry, and repeat as necessary for desired coverage.

Light:
1. Pop off the stem and stake.
2. Remove the crappy clear plastic part. (what would this be called? Other than ribbed for no-ones pleasure, I don't know).
3. Remove any other protruding or flange-y plastic/metal parts.
- This is so the solar panel and light package will fit inside the opening of the jar.
4. Attach your solar array to the inside of the glass lid with CLEAR adhesive.
- I drew 4 non-connecting thin lines of glue onto the top of the solar piece where it lines up to touch the lid, pressed it together hard, and let it sit for a day.


- Take care not to put too much glue on, or to glue in an unbroken circle. This will make it fail to dry well inside the connected glue circle you've made, and be white instead of clear: looking like snot and blocking the solar rays from your panel. Yum.

Yes
Noooo


When everything is dry, just slip the lid-light into place on the jar and put in a spot where it will receive enough light. And compliments. Your ego Jars love compliments.


-Lindsay

Monday, June 24, 2013

Dining room pendant project - part 1

I oogle lighting during my lunch break. I have lights in every room, but most are far from ideal.
My current target is the dining room chandelier. It came with the house and is cute, but only sort of worked with my dining set, and I knew I'd probably change it down the line.

9 person thanksgiving. before I actually lived there.
at least the walls were painted.

bling bling

I'm giving away that dining set, and now the existing chandelier really really doesn't work with the new round table and settee arrangement.

Side note: More to come on the new dining setup when I get a chance to take pictures. The table got brought in only last night and needs some work, but the pictures below give a general idea of what I'm going for.

Back to lighting. I've waffled on what would be the best replacement. I like the diffused light and modern appeal of drum lights:

every modern barbie house needs a bowl of pears

While barn pendants and their rustic, minimalist look make my heart go pitter-patter:

pears for all

My big issue with barn pendants has been their single bulb. Would not sufficiently light up the dining room, much less my life. Drum pendants with multiple bulbs are more $$ than I'm willing to part with, especially since I'm leaning towards the barn fixtures. What to do, what to do.....
While running errands the other day, I spotted a torchiere lamp sitting by the side of a dumpster. Ugly lamp on its own, but upon closer inspection, the ceiling facing shade was metal and barn-ish shape. And had TWO light sockets. Mind made up for me. Thank you dumpster fairy! 

woop, there it is

Good thing one of my back seats was already down, cuz that baby was in the car 3 seconds later. 

don't mind the perma-coats of sawdust in the trunk,
and spare cardigans in the back seat

Does it work? Who knows, but it can be rewired if necessary. Either way, it has all the components of a great barn pendant lamp, I just need to take a hack saw to the thing and get it disassembled.

In terms of refinishing, I'll leave the brushed aluminum outside alone, but the inside is cruddy looking and needs help.

yes, that's a home depot receipt sitting on the seat.
they litter my life.

I recently spotted an unopened can of minty green spray paint sitting in the back corner of my  'garage' closet. The tone would compliment the other colors in the living space, and would be pretty to look up and see a pop of color at while sitting at the dining table.
Kind of like this:


But inside out. And no white. And no wire cage. And two edison bulbs. And swag hung rather than mounted:


But you get the idea. Hopefully.


-Lindsay