(n.) Cabindo: A condo on a lake, among tall old trees. Half cabin, half condo. My first home. This is a running journal of the renovations, projects, and general shoestring budget craziness.


- - - - - - - - - - - - - - - - - - - - - - - - - - - - - - - - - - - - - - - - -

Instagram

Showing posts with label shelving. Show all posts

Monday, October 21, 2013

Weekend Treasures

While trolling Craigslist on Friday I saw a posting with blurry pictures for a shipping trunk and old speaker.

Mind the sea-sickness

Is that teak I see? And a shadowy peg leg?
Yar.

From what I could see, they looked good enough to go for, so I said I'd take both and headed over during lunch to pickup.

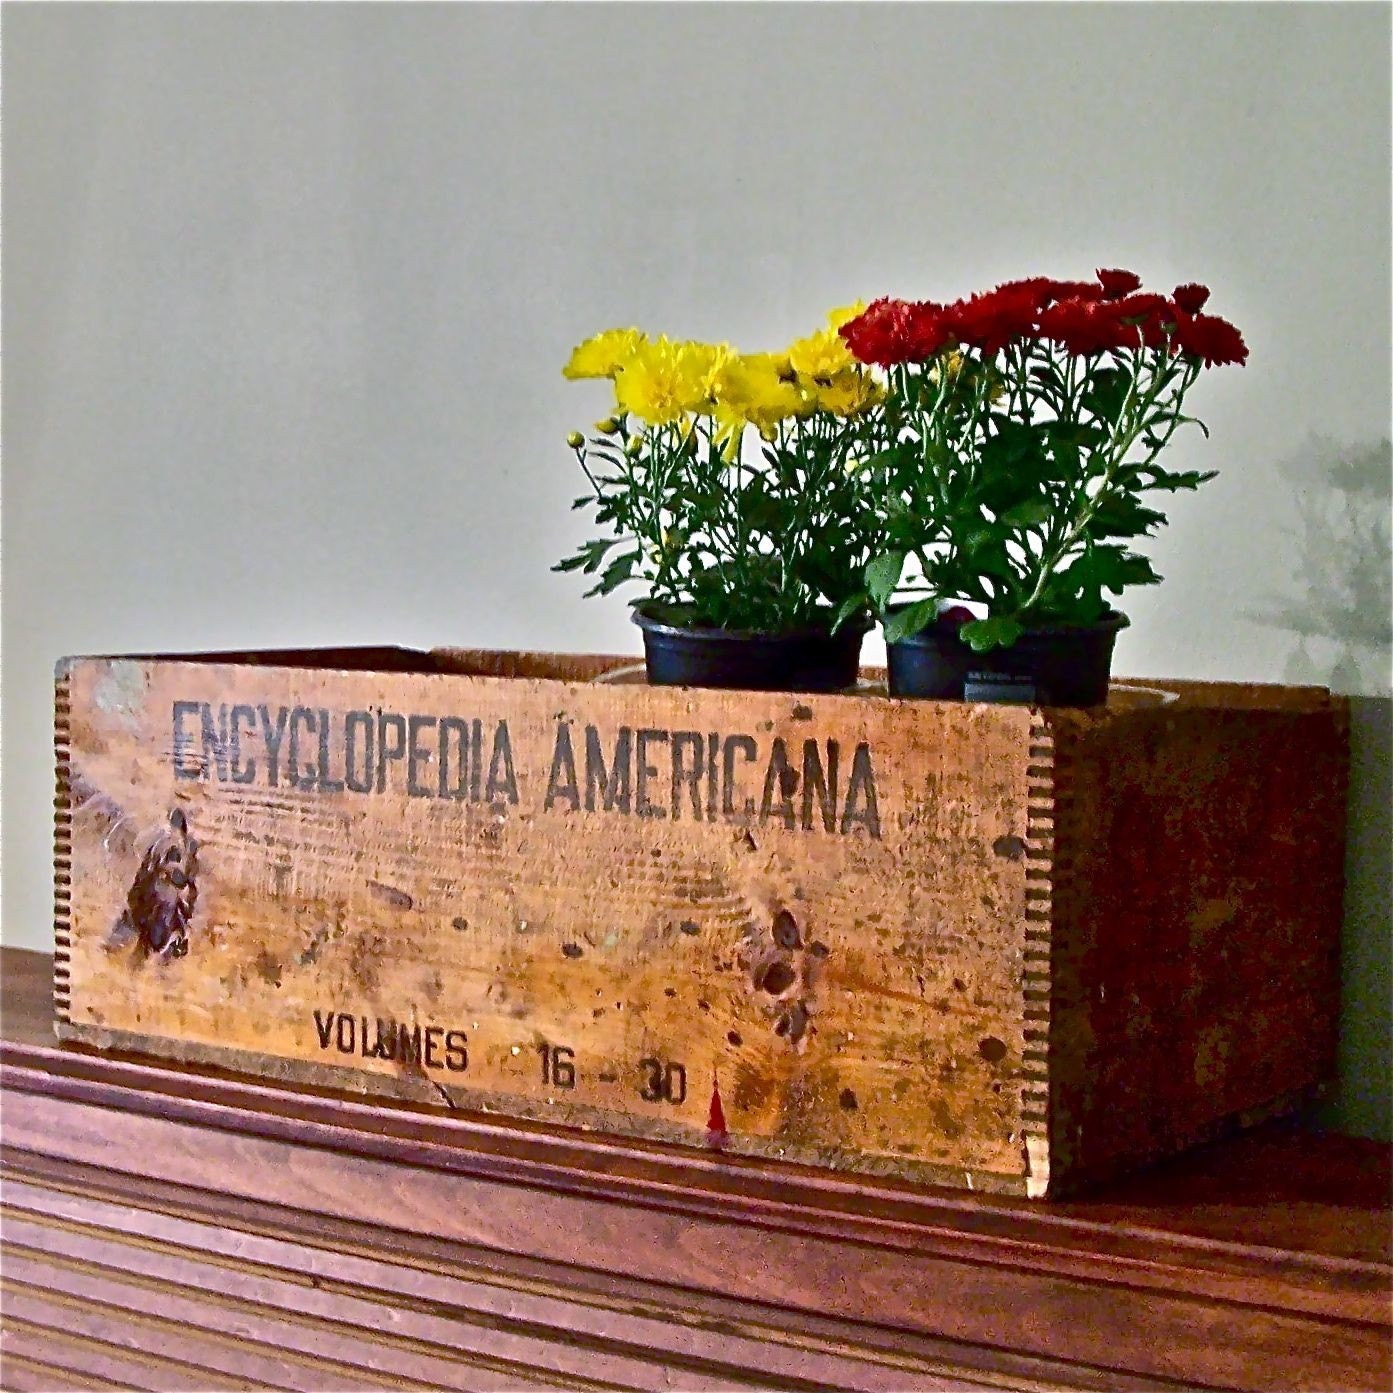
The trunk was gone to an earlier scavenger by the time I got there, but the speaker was mine all mine. I also landed a barely used cat tree and an old wooden Encyclopedia Americana shipping box.
NEEDS MORE COWBELL JOINTING. Said no one ever.

The box is drying out, after which I'll mount it for use as a wall shelf somewhere. Comme ca:

pin

pin

For the speaker, I plan to do a speaker-gut-ectomy and add simple ledger shelves.

pin

It has beautiful mid century bones with solid teak construction and 3 brass-tipped peg legs. It's banged up pretty well, but is structurally sound. I'll only sand and lightly seal the exterior ala the entertainment center. Hopefully it will come out just as well. The inside will probably be painted something dark to contrast with the lighter exterior wood box.

pin

I haven't seen any speaker-to-shelves floating around the interwebs, so perhaps it will be a genuinely new fangled idea.


The super sweet lady who put up the craigslist post was cleaning out her parents house after they moved into a condo. I offered to help lift/move around anything she needed since she was kind enough to give away good stuff for free. She declined at the time, but our pleasant interaction must have made enough of an impression that she emailed me the next day offering a different trunk she'd intended to keep, but couldn't, and could I help move a couch while I was there? YES and YES.
I'd seen a trunk the day before and was hoping really hard that it was the one she was offering. Because it was a real-life antique version of a Restoration Hardware piece that I've been loving from afar.

Reproduction
on sale for $1045
And it was.

The Real Thing.
(Pardon the spiderwebs n schmutz on the carpet)

Stenciling, and leather handles, and shipping stickers; oh my!

With a promise to never throw it away and to email her should I ever not be able to keep it; I loaded it up. Judging from the shipping label on the back, I think it was used by her Dad's while he was in the Army in the 60's. I understand it's an important piece to her and am glad she thinks I'll give it a good home. Not that I ever plan to stop loving it, but if push comes to shove, I'd be happy to get in touch with her and send it along.

In the meantime, I need to clean up several decades of cobwebs & dust on the outside, and check the state of the inside. There might even be some junk in there.

What will I use it for? Where will I put it? Do I even have room? Am I losing my marbles to get another trunk (this makes 3)?
Excellent questions. I have no answers yet.
Much like sparkly things, shiny things are appreciated here and resolutely kept, murky future or not.

Leather handles also appreciated.


-Lindsay

Thursday, August 29, 2013

The Shoe Shelf of Happiness

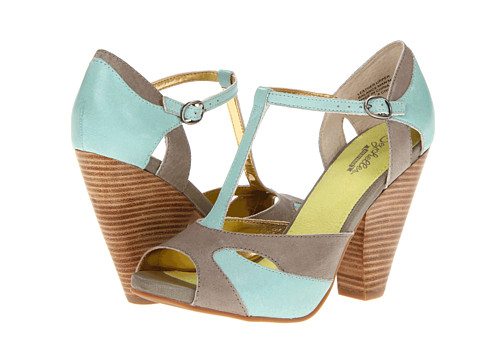
As I've alluded to several times; I have a thing for shoes. I'll chalk it up to being another one of those unavoidable female traits. I love playing outside, getting dirty, firefighting, jumping in rivers, etc.....but damn it I also have a serious soft spot for a sassy, leather stacked-wood platform sandal (among other shoe types).

On sale at Zappos.
These might get ordered later today....we'll see how much willpower I have.

To facilitate my habit, my walk in closet needed some heel-specific storage. It's not a big closet, and in addition to heels, I have a good number of flats. The flats are stored in 2 cubby organizers set long-side-down. They are short enough this way to live under the closet rods and still let the clothes above hang freely, making the most of all available floor space.

Thank you Martha Stewart.
$35 each from Home Depot. $5 each from Craigslist.

All the cubby space is occupied by flats, boots, hiking shoes, blah blah blah; and no other horizontal space is available in the closet for ze heels. So as I've done before....to the wall!

I'd seen Pins about using crown moulding to create heel-specific shelves and decided to give it a try.

Pin
Pin

The ReStore had a whole stack of crown for all of about $0.15/ft. I found a huge piece with a simple profile that was pretty an not at all foofy. After buying ~20 feet I set about building the shelves (without reading any instructions, looked easy enough).

1. Cut up ~20 ft of crown into 6 equal pieces.
2. Drilled 2 pilot holes in each piece.
3. Painted each piece bright turquoise/blue.
4. Measured and marked the wall so they would be evenly spaced from floor to ceiling.
5. Held up each piece and squirted chalk dust through the holes to mark anchor locations.
6. Inserted anchors.
7. Screwed shelves in place.

And finally, to the sound of angels singing: hung up the first set of heels......which immediately fell off.
Oh Blergh!!

I had some rolls of clear plastic drawer liner (random Ikea purchase for the win!) which I cut into strips and attached to the top of each shelf with clear adhesive. The big-boy kind of adhesive from a caulk gun mind you, cuz we don't play around with shoe safety in these parts.

plenty of room for more
awwww yeeeaahhh

The heels now all stay up safe 'n' sound, except when people are coming over in 5 mins and I wildly 'put away' clothes and other random items by launching them into the closet. I am a consummate hostess, clearly.


-Lindsay


*Update: I did get the shoes. Luckily I showed the bf right when they arrived, as he was about to order them for me as a surprise. What a guy!
They are every bit of adorable I hoped they would be, AND comfortable. Those babies will be logging a lot of non-shelf time.

Friday, August 9, 2013

Storage, in a Time of Limited Space (master bathroom edition)

Let me paint you a picture of my 'master' bathroom.

yeah this is a picture, 'painterly' words below

It's on the hall rather than connected to a bedroom, which I consider awesome because:
   1. I live here alone, so theres no need for the additional privacy of an en suite.
   2. In a 1.5 bathroom/2 bedroom unit, the off-the-hallway factor makes it guest/host friendly: cuz I am just fine with people NOT walking through my bedroom to get to the shower when staying over.
   3. For the future: it's very rental friendly. Two housemates would not go for a unit with a single shower that is an en suite. Having it in the hallway gives equal access. While I'm not going to be renting the place out for a couple years, I definitely kept that potential in mind when looking at places, and the hallway bath was one of the reasons that made this particular property stand out from the field. I have a good friend with a 1 bath (en suite) condo who loves to entertain, and it works for her because she is super neat and tidy; but I know my shortcomings, among them that my bedroom is almost never presentable enough to be a public thoroughfare.
So, long story long: I knew what in a bathroom would work for me, and luckily found it.

though it looked like this at first

While I do like my bathroom, it is standard 5'x10', which does the job nicely, but is not what anyone would call spacious. The vanity is small and mainly used for cleaning materials/toilet paper/curling irons/other big stuff. I have lots of soaps n lotions n hair products that needed a home though too. I'm a girl, goes with the territory, right?
I wanted to store all my bottled items within arms reach, in an organized and non-hoarder-ish way. The vanity counter top is small and looks cluttered with more than a few items. There is no room for a storage tower all occupiable floor space already has inhabitants (small grey trash can between tub n toilet, basket with rolled towels between toilet and vanity).

I'm excessively fond of this basket.
$10 at T.J. Maxx

As the saying goes: to the windooooow, to the wall..... or something like that. I have no window in there, so wall it was. I wanted to keep the space as open as possible, so though glass shelves would do nicely. As usual: enter Ikea, with the GRUNDTAL glass shelf.
$20 for 31"

I hung them on the same wall as the vanity, because the toilet sticks out underneath, so I wouldn't be running in to them there. Cuz if they were on the opposite wall, I'd have lost an eye in no time, and 'Pirate' is not a good look.
I really like how the paint color on the wall goes with the color of the glass.


Once the shelves were up, I needed bins of some sort to group small items, because I knew things were never going to be as sparsely populated as the picture above. I cut up an old t-shirt and crocheted it into a little basket with side handles.

lots of items, all in their place

It's adorable and I'm a big fan, but cutting up the t-shirt and crocheting gave me a blister big enough to stop after one basket.
I had 4 small grey felt bins lying around that I'd picked up on clearance from Michaels at some point in the unrememberable past.


I knew all that craft item hording would pay off at some point!! Most small items live in those bins.


Frequently used things live in the corner of the vanity and can be easily moved up to a shelf when people come over.
Face wash, sunscreen, chap stick, etc, live in the crocheted basket.
Jewelry gets deposited at the end of the day in a teacup I made in college and a saucer my mom gave me.
Toothbrush and toothpaste lives in a blown glass cup from an art studio in St.Louis I visited with my grandmother.
I really enjoy to interacting with special things on a daily basis to fulfill a need, rather than say going out and buying a matching bathroom set from Target. Not that I have anything against Target, it's just nice to use meaningful items rather than have them sit in a box or on a dusty shelf.


Ahhhhhh......organization I can keep up with, for $55.


-Lindsay

Monday, July 8, 2013

Creating custom adjustable shelving, ala the Container Store

Aside from painting top to bottom, built-in closet shelving was the first homeowner improvement project I tackled. I was giddy, I was broke, but I had a plan.

I may have mentioned it before, but my place is the condo-o-storage. It has more useful and plentiful storage than any ~1000 condo I've ever seen. Clearly, it was meant to be mine.
There are a remarkable FOUR hallway closets; a pantry, a linen closet, a coat closet, and a big empty space closet with a single upper shelf.
With a myriad of tools and materials for all my renovation projects, and no garage; I had to come up with a better storage solution than tossing everything in the big-empty-space closet.
I dreamed of Container Store Elfa shelving with vertical silver tracks and wooden shelves.

same size and # of shelves as I needed in the closet

Only $745 installed or $565 'DIY'........
Oh please to the %*#$ no.

I had a pile of fantastic old pine boards salvaged several years ago from a house I'd rented that was being torn down. They were the standard closet upper shelves, already finished in a pretty amber color.

comme ça

Using them for the shelves' surface was the linchpin in making this project possible, as I couldn't afford to buy all new hardwood boards, and saggy MDF was not gonna happen.
The hallway closet door doesn't run the full width of the closet, so I planned for 2 deep shelves on the bottom and 3 shallower ones above to get as much surface space as possible while allowing easy access to all shelves.

There were several different shelving systems at  my local Home Depot.
Pricey name brand ClosetMaid? Um, no thanks sister, I'll keep the $150 you would have cost and keep lookin.
Rubbermaid was the champ at $8 an upright, $3.75 for long brackets, and $3 for short ones.

upright
bracket


This broke out to:
$8 x 2 uprights =$16
$3.75 x 2 pairs of brackets = $15
$3 x 3 pairs of brackets = $18
    $4 x 1 box of anchors and screws = $4    
$53

Since $53 is about 9% of the high end $565 price tag: I was a proud, proud, thrifty gal.

Handy Dad and I ripped out the single upper shelf already in the closet to install the new tracks. The two holes we accidentally punched in the wall were just a bonus.
We hung the tracks starting about 6 inches down from the ceiling and ending about 8 inches up from the ground. This covered all the areas where I'd possibly want to have brackets for a shelf.
We then used the ripped out shelf as a guide to cut the pine boards to size. Something we learned here, that we keep re-learning; is that in a 40 year old building: nothing is square. Start with a pattern and then adjust for each instance of that item. That being said, unsuprisingly some shelves came out with a little wiggle room and others had to be trimmed down to fit. Between the track and the pine boards, we used scrap wood from Handy Dad's impressive garage collection to fill out the depth each shelf needed.
Each bracket has a hole for a screw, but I have neither done anything with that nor noticed the need to since construction.

hello there Garage Closet!

Not the prettiest girl at the dance, but heck, she's gonna be a glorified tool box. No worries princess.

Having gotten the hang of it, we went ahead and knocked out another set in the 2nd bedroom closet. There were two identical closets in there, each with a top shelf and hanging bar. Shelving was badly needed in one of them for office/sporting/random items, as all that hanging space would be wasted.


The wall came out unscathed on this one, but still no beauty queen in sight with those two franken-shelves on the bottom. Again though, its a closet. No one but the 5 people that read this blog (hi honey!) will see it; and inexpensive/functional/awesome always beats accumulating more debt. The mortgage alone is plenty!


-Lindsay


Wednesday, July 3, 2013

Rehabilitating a Criminally Bad Bathroom

The master bathroom has been the most extensive, time consuming, costly (though still on the cheap), and dramatic transformation of any room in my place. This is because it was clearly the only room in which there had been NO updates for many, many years. I did it all myself, with guidance and help from Handy Dad. In the process, traffic laws were broken and there may be a slightly bigger hole in the ozone, but none's perfect, and now the room's days of criminal ugliness are over.

I'll go into details in several future posts, but here's a quick before and after.

Before
this photo does it too much justice

List of offenses:
Crusty old shower head.
Splotchy black painted builder grade vanity. 
Both gold, silver, and paint splattered hardware. 
Rusted fan cover. 
Outdated tiny mirror that angled at your waist.
No personality.

After
favorite room in the place

Rehabilitation:
Herringbone pattern large slate tile floorsPink and white heart tile with brown grout. 
Subtly textured creamy white tile surround. Avocado green tile tub surround. 
Glass surround gone n holes repairedHidden nasty glass sliding doors. 
Big modern shower head and hand held sprayer. Crusty old shower head. 
Painted properly vanity in semi-gloss black. Splotchy black painted builder grade vanity. 
Painted hardware silver throughout. Both gold, silver, and paint splattered hardware. 
Painted cover n bolts silver. Rusted fan cover. 
Added stainless steel hooks on walls and bar on vanity. No towel bars. 
Over sized modern silver framed mirror. Outdated tiny mirror that angled at your waist. 
Installed wainscoting and trim throughoutBroken and skanky base trim tile. 
Hello gorgeous room! No personality. 

side by side


I look at the 'before' picture and it feels like a room in someone else's home. I look at the 'after' and I feel thankful for neighbors patient enough to live through all the banging and power tools it took to get there.

There's more work to be done here, but I can live with probation for now.


-Lindsay