(n.) Cabindo: A condo on a lake, among tall old trees. Half cabin, half condo. My first home. This is a running journal of the renovations, projects, and general shoestring budget craziness.


- - - - - - - - - - - - - - - - - - - - - - - - - - - - - - - - - - - - - - - - -

Instagram

Showing posts with label porch. Show all posts

Tuesday, August 20, 2013

Summer Porch Food Round-up

I went a little overboard on plants this summer. Home Depot's plentiful garden department, and the excitement of having my own porch overcame me. The result is about 20 pots with anywhere from 1 to 6 plants per pot. I've kept almost everything alive, but its all a little much.

just 8 of the ~13 plant containers on the back porch

As I talked about in an earlier post, I had a goal to plant something I could eat. The herbs have done gangbusters. Even though the pepper, squash, and cucumber plants haven't produced any veggies, they've put out a lot of pretty flowers and thus have earned their keep.


The tomatoes have been quite a different story. I planted early, used several varieties, fertilized, de-bugged, watered, watched and waited. No tomatoes. I plant sat a friend's tomato which quickly grew several good sized fruits. I even put my plants near the damn friend-mato thinking perhaps there was an optimal sun situation there. Mine just flowered, got huge, and laughed. grumble grumble grumble...


4ft tall tomato plants

Finally one of the 6 towering plants mustered an actual tomato.

Why hellooo dere.

It was a teeny tiny little thing, and this morning was it's time of reckoning.

side note: Beans LOVES his perch.

It was delicious! 

That little tomato definitely inspired me to eat more tomatoes next summer.....from the farm stand. 
I'll stick with petunias, they love me back.


-Lindsay

Saturday, August 3, 2013

Pretty Petite Pallet Plant ..... Thing

Sleeping out on the porch last night was glorious! The temps were in the high 60's/low 70's, and I did not get attacked by any manner of wildlife; bugs, overly affectionate cats, or otherwise.
When I woke up I let the monsters out with me, and noticed that Mr. Beans the curious did not have a spot on the plant stand upon which to sit and survey his kingdom.
My options were to move the plants onto the floor, ignore it and inevitably have him knock them over, or make alternate arrangements.  A couple of the pots had holes for hanging, but I did not want to put them straight on the wall because it is block, and a PAIN to drill into. I had one existing pre-drilled hole to work with, and a pile of (suprise suprise) pallet wood.

pile o stuff

I used some paint stirrers to bracket the pallet boards together, and added a sawtooth hanger on the back, since I had extra from the mirrors.

rawr

Taking into account the size of the plants in the pots, I awkwardly held up and guesstimated precisely measured where they would best hang, and added two sets of two screws to the front.


Using a hole in the wall that was already hard fought for made this little Saturday morning project niiiiice and easy. Thank goodness for previously expended efforts; all I had to do today was drive a screw in there.
Mounting hung on screw. Pots hung on mounting. Bing-Bang-Plants-on-the-Wall.

purdy petunias


Mr.Beans had lost interest in being on the porch by this time and cared not for his newly created spot on the plant bench. Oh well, it was a good little free n fast project anyway.


giant tomato plants. one little tomato.


-Lindsay

Thursday, August 1, 2013

Hanging a Difficult Item

While hanging my tile wall piece, I had trouble getting that little guy on the bottom right to stay on the wall.

hey there little fella

He is actually slightly bigger than the other tiles and would not make sense (to me) to include in the big hanging. I liked the idea of displaying it nearby, but was having trouble doing so.
The edges of the tile slope in slightly, as the tile is ~3 inches deep and hollow. That, combined with the slick glazed back, meant it wouldn't sit securely on a nail. It was also going to be hung pretty close to the sofa, so could be easily knocked off by spirited guests (I would never do such a thing).

had failed to bring sexy back

I thought that it simply needed something to help it grip or hook onto the nail.
I had some weatherstripping sitting around, so used the adhesive side to attach a piece on the back of the tile.

there it is

It now hooks securely onto the nail in the wall.
I'm not sure if the end of the nail bites into the squooshy weatherstripping, or if the nail head is past the strip and thus prevented from sliding. Either way: its secure as a rock and friends-with-drinks proof.

I will definitely be using this technique wherever I need to sure up the hanging of an item.


-Lindsay

Tuesday, July 30, 2013

Gettin' Horizontal......with Mirrors

Ohhh my......

This is not that kind of post.

It's this kind of post:

pin

pin

Mirrors. Hung horizontally. Yeah?
Ohhh yeeeeeaaah.
Bow-chica-preetty!

I'd seen those pins a while ago, and had squirreled them away to a board of 'nice to have' things, but didn't think I'd get around to it anytime soon.
I thought that the nook on my porch which houses the porch couch would do very well with horizontal mirrors to open up the recessed-ness of that corner.


Enter Public Surplus with 4 hot pink long mirrors.


$1 and they were mine! Oh Public Surplus, how I love you; let me count the ways.....

They had no hanging hardware so I added a sawtooth hanger to each. I drilled itty bitty holes in preparation for the itty bitty nails.


The nails were so itty bitty I could not hammer them in without hitting and smooshing the sawtooth bracket. A spare flathead bit helped me isolate the force of each hit to the just nail head.


perma-schmutz'd hands

On the back of one of the mirrors, I worked out the measurements for where to put screws into the wall.

Anything worth doing is worth over-engineering

It took a bit of muscle and a few choice words to accomplish the drilling and screw sinking in my concrete block walls. But insta-reward when the mirrors went up:

spot the creepy item

Ahhhhh......lovely!


Goes well with the new art piece on the wall. As a girlfriend said recently when she walked onto the porch 'this is what Anthro is trying to do'. Bestill my beating heart......she sure knows how to flatter a girl.


-Lindsay

Sunday, July 28, 2013

Art School Leftovers

Leftovers are awesome. Be it food, paint, fabric, rescued animals, money (ha!), or art.
I have a lot of 'leftover' art, which I absolutely treasure.

Being in the art department in college gave me the opportunity to interact with all sorts of creative and crazy talented people who had exceedingly high standards of themselves, and excelled in various fields. The painters would churn out pieces they found mediocre, but I would pee my pants if I could create, and was therefore more than happy to take off their hands. 
I had similarly high expectations for my sculpture and ceramics: it was good, but I wanted it to be great. My castoff's were still high quality, and quickly grabbed by friends who could paint the aforementioned masterpieces, but created 3-d pieces that could be described as 'paperweights' for grandma. 
For the record: I am pretty limited in my artistic talents. My painting skills do not extend past painting a wall. With the exception of pastels done one specific way, any 2-d artwork of mine is grandma territory. Unless I can make it with my hands: best of luck telling if that piece hanging on the wall depicts a landscape or a vegetable (an no, it's not like it's even abstract).

Most of this leftover art has been sitting in my parents basement, or loaned out to friends and family for the better part of 10 years. I'd recently been thinking about some handmade ceramic tiles a professor who heavily impacted/inspired me in college had given me, but I did't see anywhere when moving. Soon afterwards, I discovered them at a friend's house lining her garden. She was graciously happy to let me have them back, so I quickly snatched them up before she changed her mind. (thanks Trish!)


These tiles were made from terracotta clay in a custom built tile mold. This particular professor had gone out of her way by letting me pester her into showing how she both built tile molds, and created the tiles. It wasn't part of any normal class curriculum, just an aside one evening when we were both in the studio. She was producing a huge number of tiles for some project I can't pretend to remember. Some didn't meet her standards and she allowed me to have them. 
A hallmark of her work, to me, is the incredible texture she is able to achieve.

ceramic nerd ho

I love the piece's roughness due to it's material composition and handling, and the surface finish from the glaze and kiln effects.

I'd never done anything of substance with these tiles, but have always wanted to display them. There are no attachment points on the back of the tiles, so I decided to mount them on a board, with mortar, just like any other tile.
They are heavy, and will be hung outside, so I needed a sturdy and weather resistant board on which to mount them. 
I laid them out in the pattern I wanted and figured I could piece together a backing from some of the scrap wood piling up on my deck.


Wrong answer.
I spent a ridiculous amount of time sizing, cutting, bracketing, yadda yadda yadda, and came out with an inadequate, wonky backing. 

those aint good apples


Off to Home Depot and $6.50 later, had all the wood I needed.

2x4 strand plywood

I laid the tiles out again and traced around the edge. I lopped off the big pieces with my circular saw, and dremeled off the rest. All the cuts were straight, so this was nice n easy.

fear not, the pallet table was safe

To seal the wood, I painted the whole thing with grey primer.

project helped immensely by a delicious shandy

I then slopped on a layer of leftover mortar and laid down the tiles. I slowed my roll and let the mortar cure for 72 hours before grouting. I made sure to cover the edges of the board with the grout as well so it would not have a weird grey edge.
The thing is indeed HEAVY and required heavy duty hanging hardware on the back.

thats a good looking back side

It is now living proudly on my porch, lookin fine in the summertime.


-Lindsay


Thursday, July 25, 2013

Fan 'o' Recycling

My balcony is a great place to be, but when its a little too warm and I want to use it anyway: it gets stuffy because there's not a lot of air circulation, due to it being within the footprint of the building, rather than cantilevered out.
I took a gander at Home Goods to see if they had any clearance fans that could help a sister out; but they did not. Seems small, attractive fans are in high demand due to the season and therefore not likely to be on clearance: my bad.
In my parent's garage I re-found (as I'd used this thing many times) an old office fan that worked well, but looked quire unappealing.

Reliving the 80's through beige and tan.

As I do love free things, I went about making it work for me.

I took the thing apart and cleaned 20 years of dust and schmutz from the surfaces and motor. All the plastic surfaces were super smooth, so I gave them all a light sanding with a sanding block. I taped all the pieces off so the lines would be crisp and paint wouldn't get all over the blade cover. Any paint on the grating would be a pain in the @$$ to scrape off.


I primed the whole thing to further ensure that the new paint would stick to the plastic surfaces. Using some black and minty green spray paint I already had, I gave each piece several light coats. The mint colored paint did not provide great coverage, so it those pieces got about a million coats.

Because I'm in a condo, don't have a private yard, and I mainly do these projects in the evening after dark; I execute the spray painting of small objects a little oddly. With outstretched arms; I lean out over the balcony railing and work in short bursts. I wear a latex glove on the hand grasping the object so that I wont walk into work the next day sporting the overspray as a crappy hand accessory.

picture this holding fan parts

With some trial and error; I reassembled the pieces.
Blow me over: that's one good lookin fan.


A retro-redo for $0.


-Lindsay


Tuesday, June 25, 2013

Mercury Glass Solar Mason Jar

My porch currently has no electric wiring or light fixtures, so has been in need of non-flame soft lighting.  Solar jars caught my eye, but I wasn't really loving the frosted or firefly versions. I settled on mercury glass, as they seem to have that perpetually good (to me) mix of vintage and modern. Commercially available ones were chintzy looking and small, so I set out to make my own.

I'd scanned a couple tutorials on mercury-glassing and solar jar making. The basic ingredients are as follows:

1. Mason Jar
2. Solar light source
3. Spritzer bottle
4. Metailic spray paint
5. Water (some people use 1/2 water, 1/2 vinegar. I had no vinegar and used a slightly different method)


from Landee see, Landee do

While the ones above are more silver than clear glass (and beautiful as they are), I wanted mine to be more translucent so plenty of light can shine through.

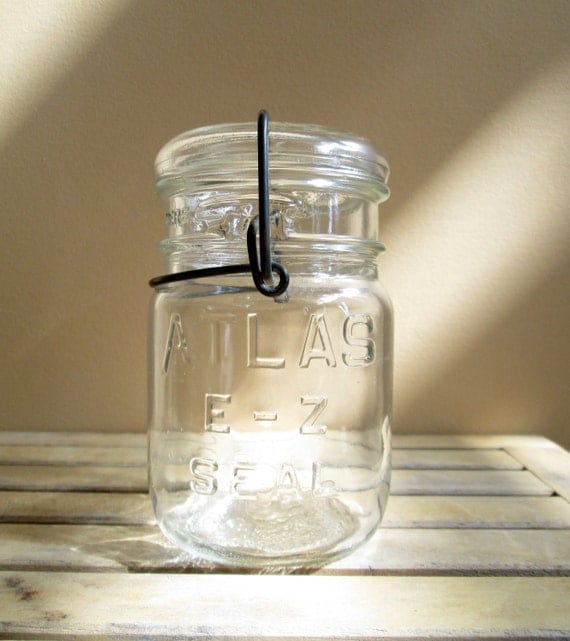
I picked up two old Atlas glass lidded mason jars from Chantilly Habitat for Humanity ReStore for $1 each.


Two solar path lights from Target on sale for $2 each. (similar to below, not exactly)


A spray bottle from Home Depot for $1.


A can of metallic silver paint from Wal-Mart for $4.


And tap water for freeeeee!


My steps were as follows for the glass treatment and light assembly.

Glass:
1. Lightly spritz the inside with water.
2. Spray the paint inside.
3. Swirl the jar around to mottle the paint and water.
4. Spritz/swirl again if more movement/thinner paint is desired.
5. Set upside down on paper towel for excess water/paint oil slick to drain.
6. Wait to dry, and repeat as necessary for desired coverage.

Light:
1. Pop off the stem and stake.
2. Remove the crappy clear plastic part. (what would this be called? Other than ribbed for no-ones pleasure, I don't know).
3. Remove any other protruding or flange-y plastic/metal parts.
- This is so the solar panel and light package will fit inside the opening of the jar.
4. Attach your solar array to the inside of the glass lid with CLEAR adhesive.
- I drew 4 non-connecting thin lines of glue onto the top of the solar piece where it lines up to touch the lid, pressed it together hard, and let it sit for a day.


- Take care not to put too much glue on, or to glue in an unbroken circle. This will make it fail to dry well inside the connected glue circle you've made, and be white instead of clear: looking like snot and blocking the solar rays from your panel. Yum.

Yes
Noooo


When everything is dry, just slip the lid-light into place on the jar and put in a spot where it will receive enough light. And compliments. Your ego Jars love compliments.


-Lindsay