(n.) Cabindo: A condo on a lake, among tall old trees. Half cabin, half condo. My first home. This is a running journal of the renovations, projects, and general shoestring budget craziness.


- - - - - - - - - - - - - - - - - - - - - - - - - - - - - - - - - - - - - - - - -

Instagram

Saturday, June 29, 2013

Hide the litter-box plans

Even 'cat people' hate litter boxes. I don't know about crazy cat ladies, I don't associate with any....wouldn't want it to rub off.

I have been trying to figure out the best and least stinky/dusty/grit on the floor way to have my cats' litter box in my place. Ideally, I would get a sliding door pet insert and put it out outside.

$137 at home depot

The box would be off in a corner during any non-freezing cold weather. My test run of this plan was foiled by little man Mr.Beans who has acute allergies, asthma, and cystic fibrosis (among other health issues), and instantly reacted badly to so much time out in the pollen filled air.

a bad Beans day. the ears say it all.

He does ok with open windows from time to time so, I'm going to have to make a more enclosed outdoor solution that prevents him from lounging out on the balcony for hours on end.


It needs to look better than the setup above, as it will be visible from inside and not hidden away in a garage that I don't have.

nice s*%t box

I've seen some Ikea hacks, but ultimately, I was waiting for a cabinet to materialize in a cheaper manner than buying brand new.
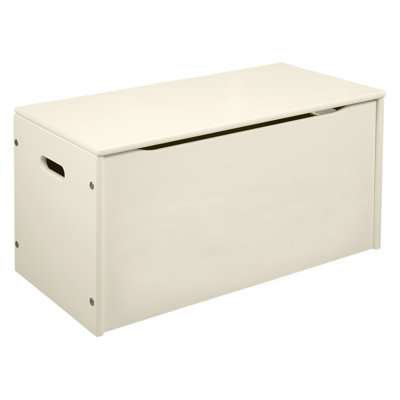
My upstairs neighbor, who was renting and is moving out, threw an obscene amount of stuff in the dumpster yesterday, including a great toy chest I am now scheming on how to use for a cat box.

just like this, but without handle holes

I am both thankful for the bounty I found next to the dumpster and her impending absence. She was not very friendly or considerate. While we all can appreciate Billy Joel from time to time, she would blast it at 3am on a Tuesday in her bedroom right above mine, and screech along loudly with a friend (notable quotes I could hear from above 'I must not be good, cuz I didn't die young: I'm old and still aliiiiive!'). This is just one example in a battery of charming behaviors involving various repetitive loud noises, perma-junk/trash on her front balcony, and offensive incessant smoking. But I digress and will put away the hater-ade for today.

I'll use the chest in a similar manner to this Ikea hack, but with the lid opening on the top:

Fatum Kitty Loo
I'd like to perhaps make the back wall plexiglass to allow more light into the box, but will experiment before cutting a big hole for that in the actual box.

Other than that, all I anticipate needing is some paint: to shine up the scratched n dented outside/seal the inside from potential out-of-box incidents, and a cat door

Pet Door, $20 from Home Depot


So it'll be a pretty nice little project, I'll go to Home Depot, maybe trim out the thing with pallet wood, I don't know, I don't know if we'll have enough time.


Frank

Friday, June 28, 2013

Kindness is a new stove

My kitchen is right by the entry balcony of my unit. One whole wall of the room is glass and you actually walk by it to get to the front door. 

its my house in a box


You can see some cabinets, the fridge, a bit of the sink, and some wall space as you go by, but the stove is tucked away in a corner over your left shoulder. When I walked up to The Cabindo the first time, I marveled at the pretty new maple cabinets and the attractive kitchen counters. I cringed at the white fridge and shiny rust wall color that made the spacious room look greasy and small, but hey: good lookin' structurally sound cabinets and counters?!? #winning

Then I went in, and there they were: the miss-matching ancient bosom buddies. Side by side. A decrepit taupe dishwasher and an ancient stove; complete with a collection of dead bugs behind the egg timer glass. 

uhh. you said something was pretty in here.....? 
This had been a rental property for many years, so I understand why none of the appliances were from this last decade or matching. That's fine with me; I'm definitely not one of those House Hunter snots who simply muuuuust have all granite and stainless, in their first home, right off the bat, no exceptions. HA! Anyway, I was so excited and smitten with the place: I really didn't care. The appliances worked, which is the most important thing about them, and I thought ok; its not a good looking room right now, but once I paint:

peach walls with green accents
to open up the room and compliment the counters and cabinets

install a back splash:

subway tile with an interesting edge

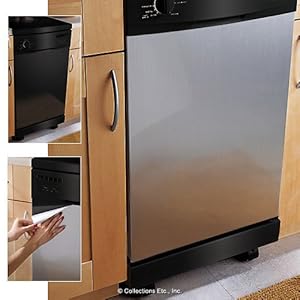
 put stainless film on the dishwasher:

$20 to fancy

yadda, yadda, yadda....(insert unrealistic expectations here).....it'll be great! Just that easy!

So I bought the place, and upon hosting my first event, used my ugly-but-working (home inspector approved) stove and dishwasher. Errrr....turns out that while they switched on and didn't start a fire, they didn't really fulfill their particular functions. The oven sent out a noticeable waft of gas (up from the delicate one it seemed to emanate even when off) and took forever to heat up to temperature. The btu's it was throwing out also got the room way up in temperature. We lived, peeled off a layer, and had another beer. After dinner, dishes were quickly rinsed and put in the dish washer. Surprise! They came out dirtier. The look on the faces of my and my Bf's mothers were pricelessly: 'disgusted-but-smiling-because-it's-thanksgiving-dammit' when they went to unload it.

So the hunt for affordable replacements began. For safety reasons, and the fact that I can wash dishes by hand but not bake pizza by the power of my gaze, a non-gas leaking oven was first on the list.
I'd struck out on Public Surplus and the ReStore for gas ranges, but hit the jackpot on Craigslist. I saw a lot of high quality gas stoves in the $200/$300 range all over the DC area, mostly far away from me, and still more than I wanted to spend. Then one popped up of the same quality, but offered at $100 and right by my fire station. I immediately called the guy and he said it was still available and would I like to come see it. Yes please and thank you sir!
An important part of Craigslist is the buddy system, so I promised a hearty breakfast after duty the next day to one of my firehouse buddies who lives around the corner in exchange for backup and help lifting.


We get to the seller's house and he was welcoming and friendly. He see's my friend's fire station sweatshirt (this happened right before Christmas and it was cooold out), and tells us about how he's been a long time supporter of the station, takes his grand kids to all the open houses, watches the Santa parade,


donates football tickets to a Redskins game every year for the fire fighters, etc. etc. Again, salt of the earth, lovely, lovely guy.
Oh, and the stove was great too.

hey there shiny britches

So he's having the new stove installed the next day (double oven, Christmas gift for his wife), and we would come back then to pick up the old one once its disconnected. We are going to leave and I try and hand him the advertised $100, and he shakes his head and says, 'how about $75?". Um.....ok!!
We arrive the next day to pick up the oven, and he and his wife hand me an envelope.
It has $75 in it.
I look up at them, and with big smiles on their faces they say: "Thanks for your service. Merry Christmas!"
Well shit.
I don't think it would be appropriate to hug them, and I'm trying not to cry at this point because that's the kindest thing ever and I'm easy to tears, so I just babble profuse thank you's as we lug the thing out the door. Mr.Nice Guy is smiling the whole time and telling us what good cookies the thing bakes. Ugggh, my heart strings are all pulled and my faith in humanity is bolstered.

waiting for installation
the holiday spirit is strong with this one.


Kindness is a new FREE stove.


-Lindsay


Tuesday, June 25, 2013

Mercury Glass Solar Mason Jar

My porch currently has no electric wiring or light fixtures, so has been in need of non-flame soft lighting.  Solar jars caught my eye, but I wasn't really loving the frosted or firefly versions. I settled on mercury glass, as they seem to have that perpetually good (to me) mix of vintage and modern. Commercially available ones were chintzy looking and small, so I set out to make my own.

I'd scanned a couple tutorials on mercury-glassing and solar jar making. The basic ingredients are as follows:

1. Mason Jar
2. Solar light source
3. Spritzer bottle
4. Metailic spray paint
5. Water (some people use 1/2 water, 1/2 vinegar. I had no vinegar and used a slightly different method)


from Landee see, Landee do

While the ones above are more silver than clear glass (and beautiful as they are), I wanted mine to be more translucent so plenty of light can shine through.

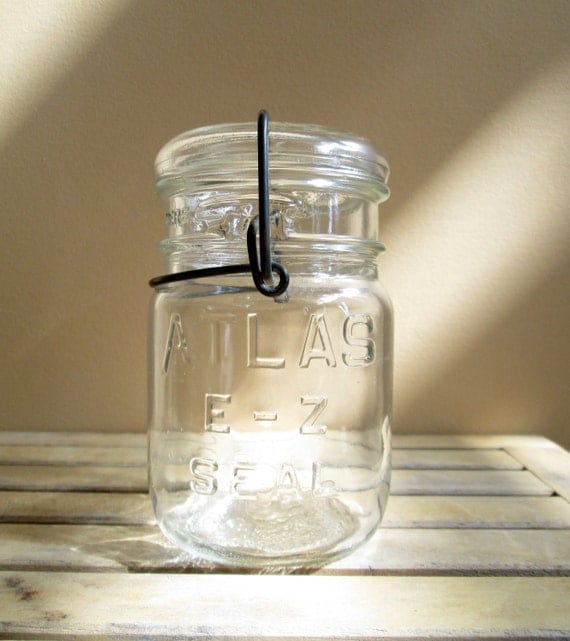
I picked up two old Atlas glass lidded mason jars from Chantilly Habitat for Humanity ReStore for $1 each.


Two solar path lights from Target on sale for $2 each. (similar to below, not exactly)


A spray bottle from Home Depot for $1.


A can of metallic silver paint from Wal-Mart for $4.


And tap water for freeeeee!


My steps were as follows for the glass treatment and light assembly.

Glass:
1. Lightly spritz the inside with water.
2. Spray the paint inside.
3. Swirl the jar around to mottle the paint and water.
4. Spritz/swirl again if more movement/thinner paint is desired.
5. Set upside down on paper towel for excess water/paint oil slick to drain.
6. Wait to dry, and repeat as necessary for desired coverage.

Light:
1. Pop off the stem and stake.
2. Remove the crappy clear plastic part. (what would this be called? Other than ribbed for no-ones pleasure, I don't know).
3. Remove any other protruding or flange-y plastic/metal parts.
- This is so the solar panel and light package will fit inside the opening of the jar.
4. Attach your solar array to the inside of the glass lid with CLEAR adhesive.
- I drew 4 non-connecting thin lines of glue onto the top of the solar piece where it lines up to touch the lid, pressed it together hard, and let it sit for a day.


- Take care not to put too much glue on, or to glue in an unbroken circle. This will make it fail to dry well inside the connected glue circle you've made, and be white instead of clear: looking like snot and blocking the solar rays from your panel. Yum.

Yes
Noooo


When everything is dry, just slip the lid-light into place on the jar and put in a spot where it will receive enough light. And compliments. Your ego Jars love compliments.


-Lindsay

Monday, June 24, 2013

Dining room pendant project - part 1

I oogle lighting during my lunch break. I have lights in every room, but most are far from ideal.
My current target is the dining room chandelier. It came with the house and is cute, but only sort of worked with my dining set, and I knew I'd probably change it down the line.

9 person thanksgiving. before I actually lived there.
at least the walls were painted.

bling bling

I'm giving away that dining set, and now the existing chandelier really really doesn't work with the new round table and settee arrangement.

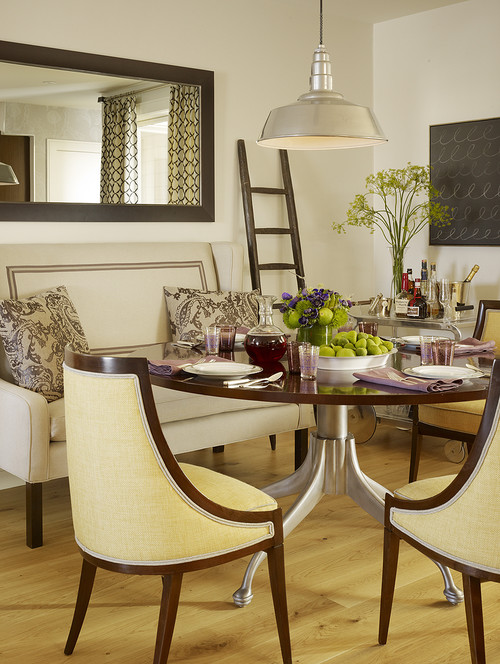
Side note: More to come on the new dining setup when I get a chance to take pictures. The table got brought in only last night and needs some work, but the pictures below give a general idea of what I'm going for.

Back to lighting. I've waffled on what would be the best replacement. I like the diffused light and modern appeal of drum lights:

every modern barbie house needs a bowl of pears

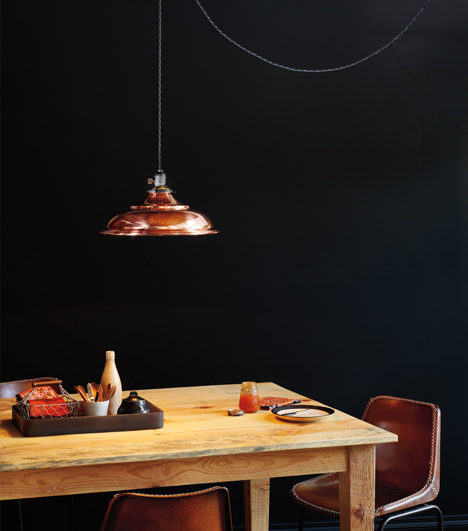
While barn pendants and their rustic, minimalist look make my heart go pitter-patter:

pears for all

My big issue with barn pendants has been their single bulb. Would not sufficiently light up the dining room, much less my life. Drum pendants with multiple bulbs are more $$ than I'm willing to part with, especially since I'm leaning towards the barn fixtures. What to do, what to do.....
While running errands the other day, I spotted a torchiere lamp sitting by the side of a dumpster. Ugly lamp on its own, but upon closer inspection, the ceiling facing shade was metal and barn-ish shape. And had TWO light sockets. Mind made up for me. Thank you dumpster fairy! 

woop, there it is

Good thing one of my back seats was already down, cuz that baby was in the car 3 seconds later. 

don't mind the perma-coats of sawdust in the trunk,
and spare cardigans in the back seat

Does it work? Who knows, but it can be rewired if necessary. Either way, it has all the components of a great barn pendant lamp, I just need to take a hack saw to the thing and get it disassembled.

In terms of refinishing, I'll leave the brushed aluminum outside alone, but the inside is cruddy looking and needs help.

yes, that's a home depot receipt sitting on the seat.
they litter my life.

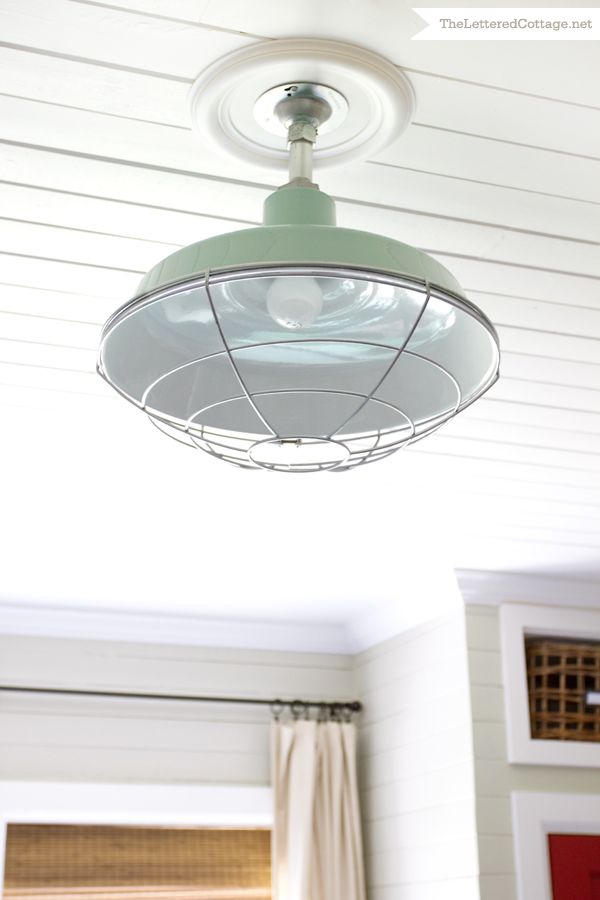
I recently spotted an unopened can of minty green spray paint sitting in the back corner of my  'garage' closet. The tone would compliment the other colors in the living space, and would be pretty to look up and see a pop of color at while sitting at the dining table.
Kind of like this:


But inside out. And no white. And no wire cage. And two edison bulbs. And swag hung rather than mounted:


But you get the idea. Hopefully.


-Lindsay

Monday, Monday

Mornings are not my thing.

My alarm this morning went off at 4am to switch units at the station, then again at 6am to pack it up and go home. Both buzzings were a bit unwelcome, but once I drag my butt out of bed, Monday mornings have become a favorite part of my week. 6am is early enough to miss the traffic, the air is still cool, and it gives me a chance to run errands, (both home depot and my local grocery store are open that early) and pick up the house before the week really starts. A stolen hour or two where I don't have to get anything done, so everything is bonus points.

Today, I took some time to sit and enjoy the morning on Porch Couch with a cup of tea and some delicious Jordanian honey a worldly friend gave me.

herb trimmings to share at work

There's a mama bird who has a made a little cocoon nest in an empty wall planter. I think she is a Carolina Wren and has four little tan eggs. She does not seem to mind me being around, but happened to fly in when the cats were out this morning. One took interest, but I grabbed her (the cat) before she could move. I like my bird-mama and had a minor heart attack, so lesson learned: morning time is for the birds....no cats allowed.

who? me?


-Lindsay


Thursday, June 20, 2013

Porch Couch. Say it 5 times fast

There are two balconies off the back of my unit (for some reason that sounds like the beginning of a song or a pickup line to me, but anyway) facing the lake. The view is lovely, they are exceedingly private and were two of the many reasons I bought this place. I have been working to turn them into usable, comfortable spaces for myself, the  fur-balls, and guests.

Below are some MLS pictures of the space pre-me.
dining room/living room balcony
Master bedroom balcony

the view, with the lake just visible through the full trees

My general goals for this year with the living area balcony have been:
          - keep kamikaze cats from launching off in pursuit of birds
          - seating to accommodate several people comfortably
          - have a flexible space which can accommodate open air projects (ex. furniture refinishing)
          - plant something pretty
          - plant something to eat
          - make an interesting, but not view-obscuring plant stand
          - get rid of nasty indoor, but used outdoor, carpet
          - something to lounge/take a nap on
          - somewhere to set for food and drink
          - make the most of the wall space with thoughtful decoration
          - provide some sort of lighting until electricity can be brought out

I've made progress on every point, and have more goals for next year, but in this post would like to tell you a little bit about my friend: the porch couch.

Porch couch lived many months or years (I'll never know for sure, but that's ok, it doesn't pain me) unloved and undervalued, as boring and stained seating somewhere in the Fairfax County government system. I found him through an amazing adoption website for abandoned institutional items. Public Surplus. I feel bad for all the cast off little things, so I adopt (probably too) frequently. I'm so grateful that P.S. could bring porch couch and I together for the low low adoption fee of $27.58. As my dad pointed out, I couldn't even buy the wood to build it for that price.

poor little guy, just look at that unfinished oak
I got him home via 495, up the 8 stairs to the door, through the house, and standing up vertically in a corner of the porch; thanks to the muscle power of unwitting assistants.

Scene: Mom and Dad stop by after dinner to retrieve their truck I'd borrowed for the day to pickup the couch.
Dad [seeing couch still in back of truck]: oh wow. That's a big couch! You can pick that up by yourself to get it inside?
Me [puppy dog eyes and big smile]: oh no! I thought so (really I did, it got loaded into the back so easily. I must have glossed over the loading dock and burly man-helper part), but now I think I really need your help....
Mom [laughing]: It's getting dark. I'll carry the cushions. good luck.

I 'knew' the couch would fit in its intended sheltered nook in the porch, but I definitely wondered if my measurements or PublicSurplus' were off as I wrangled the thing from standing on end to resting on it's legs, because lemme tell you, that sucker has about an inch of clearance on each side when in place. Its fantastic, but I'm glad my knee didn't sustain (yet another) injury, as I thought it might while tweaking it sideways and nearly falling into position.
I wanted a rich dark tone for the wood, and tested out a couple different stains that I already had. A combination of Jacobean and Ebony looked to fit the bill. After removing a surprising amount of tape from the frame, I painted the stain mixture on, and porch couch looked like this:

fake-tan couch
Eeehhhh, not so rich. A little blotchy n orange. Perhaps it originally hails from the shore? (if you catch my [long shore] drift).
Oh my word. Sorry for that groan you just let out.
Anyway, 2 more coats later and a handful of colorful words directed at all the damn nooks and crannies in the frame, it looked great.

As for the cushions - those covers got stripped off and immediately thrown in the wash. Beyond the gross thought that they had been sat on by countless people who had not washed their hands before that tax lien hearing and nervously fiddled with a cushion seam, or crop dusted their ex while waiting for divorce court; they were stained and nasty looking. The covers came out of the wash spotless and bright, but the boring blue, kinda corduroy fabric was not comfortable to sit on and didn't have the look I was going for.
Recycling to the rescue! In my sizable 'collection' (ie. backlog/horde) of fabric, I'd squirreled away the old shower curtains from my last apartment and Al's last bathroom update. These seemed like everything I could want to upholster the cushions: free, bright, related patterns, complimentary colors found in nature, free, water friendly, visually interesting, available, not a grain sack like everyone on pinterest, and free.
I laid out the two shower curtains with an additional outdoor fabric from 'the collection' to make sure they would actually look good in real life and not just my head, and to estimate if I had enough fabric by using the old covers as a template.

This is Sprout. She wants to help.
She's huge (that's the cover for a back cushion she's pretty much covering),
enjoys bird watching, being brushed, and sounding like a squeaky toy.
This helped me figure out that I'd have to do all the top cushions in one shower curtain, and all the bottoms in the other. With the blue striped fabric filling out gaps, I had just enough yardage needed to get them all covered. The green seemed to be the slightly more durable and less stain-able fabric, so to the bottom cushions it went.
To help the manufacturing process go a bit more smoothly, I made patterns out of some more fabric from 'the collection' for which I had no plans.

This is Navy. She does not want to help.
She wants to say something. She's gonna put it out there;
if you like it, you can take it, if you don't, send it right back.
She wants to be on you.
Wait.
Wait, wait, wait, wait, wait..........she......she wants to be on you.
The pattern making phase was slowed down by the puddle of cute that plopped on the cushion immediately when it was placed on the floor, and would not move. But, if these are the times that try crafters' souls: I'm a-ok with that.
Anyway...
I made my cuts so that all the different fabrics would make one large rectangle when sewed together. I did make some mistakes because it was a Friday night when the bf was out of town and honestly, I was distracted by TLC and my glass of wine. But such is life, and you're only gonna see one half of the cushion when its in place anyway, so bottoms up and move along. I completed the assembly of each rectangle with double-stitched seams to keep the fabric from running or tearing under the strain of many *ahem* users, and did a contrast stitch at the joining of each piece to keep the seam lying flat, for additional durability, and cuz its darn purdy. Al especially appreciates a good contrast stitch, and as he is not a big fan of his old shower curtain (not of me using it, just the curtain in general), so I thought this touch would give him something to particularly like about the upholstery. With my rectangles ready to go, I had another glass of wine and made single-piece-style envelope cushion covers. Most tutorials show how to do an envelope cover with 3 pieces, but that's 2 pieces too complicated for me. There's a good single piece tutorial here.
I proceeded to wrestle the covers onto the cushions - seriously; with stiff cushions, the fabric overlap, and tightly fitted covers, you're working for it. It was then I realized the curtains were open and my neighbors would probably no longer talk to me for fear I'd murder them or their furniture. More room on the couch for me I suppose.
Originally I was going to make four more seams on each cushion to make proper boxed corners since the cushions' foam is shaped like a block.


But, it was late and 24 more double-stitched seams were just not going to happen. So, I tucked in the corners (this lady has good pictures of it - thank you google for helping me find illustrations after the fact), put the cushions on the wooden frame, and made a quick lumbar pillow to make it look like a real boy outdoor couch.

Voila! I give you Porch Couch.

short, dark, and sturdy. he's what dreams are made of.


-Lindsay