
 |
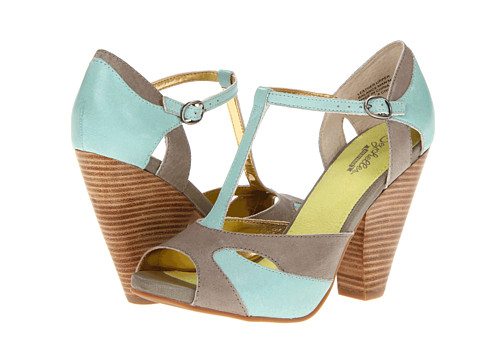
| On sale at Zappos. These might get ordered later today....we'll see how much willpower I have. |
To facilitate my habit, my walk in closet needed some heel-specific storage. It's not a big closet, and in addition to heels, I have a good number of flats. The flats are stored in 2 cubby organizers set long-side-down. They are short enough this way to live under the closet rods and still let the clothes above hang freely, making the most of all available floor space.
 |
| Thank you Martha Stewart. $35 each from Home Depot. $5 each from Craigslist. |
All the cubby space is occupied by flats, boots, hiking shoes, blah blah blah; and no other horizontal space is available in the closet for ze heels. So as I've done before....to the wall!
I'd seen Pins about using crown moulding to create heel-specific shelves and decided to give it a try.
I'd seen Pins about using crown moulding to create heel-specific shelves and decided to give it a try.
 |
| Pin |
 |
| Pin |
The ReStore had a whole stack of crown for all of about $0.15/ft. I found a huge piece with a simple profile that was pretty an not at all foofy. After buying ~20 feet I set about building the shelves (without reading any instructions, looked easy enough).
1. Cut up ~20 ft of crown into 6 equal pieces.
2. Drilled 2 pilot holes in each piece.
3. Painted each piece bright turquoise/blue.
4. Measured and marked the wall so they would be evenly spaced from floor to ceiling.
5. Held up each piece and squirted chalk dust through the holes to mark anchor locations.
6. Inserted anchors.
7. Screwed shelves in place.
And finally, to the sound of angels singing: hung up the first set of heels......which immediately fell off.
Oh Blergh!!
I had some rolls of clear plastic drawer liner (random Ikea purchase for the win!) which I cut into strips and attached to the top of each shelf with clear adhesive. The big-boy kind of adhesive from a caulk gun mind you, cuz we don't play around with shoe safety in these parts.
The heels now all stay up safe 'n' sound, except when people are coming over in 5 mins and I wildly 'put away' clothes and other random items by launching them into the closet. I am a consummate hostess, clearly.
-Lindsay
*Update: I did get the shoes. Luckily I showed the bf right when they arrived, as he was about to order them for me as a surprise. What a guy!
They are every bit of adorable I hoped they would be, AND comfortable. Those babies will be logging a lot of non-shelf time.
1. Cut up ~20 ft of crown into 6 equal pieces.
2. Drilled 2 pilot holes in each piece.
3. Painted each piece bright turquoise/blue.
4. Measured and marked the wall so they would be evenly spaced from floor to ceiling.
5. Held up each piece and squirted chalk dust through the holes to mark anchor locations.
6. Inserted anchors.
7. Screwed shelves in place.
And finally, to the sound of angels singing: hung up the first set of heels......which immediately fell off.
Oh Blergh!!
I had some rolls of clear plastic drawer liner (random Ikea purchase for the win!) which I cut into strips and attached to the top of each shelf with clear adhesive. The big-boy kind of adhesive from a caulk gun mind you, cuz we don't play around with shoe safety in these parts.
 |
| plenty of room for more awwww yeeeaahhh |
The heels now all stay up safe 'n' sound, except when people are coming over in 5 mins and I wildly 'put away' clothes and other random items by launching them into the closet. I am a consummate hostess, clearly.
-Lindsay
*Update: I did get the shoes. Luckily I showed the bf right when they arrived, as he was about to order them for me as a surprise. What a guy!
They are every bit of adorable I hoped they would be, AND comfortable. Those babies will be logging a lot of non-shelf time.
No comments:
Post a Comment